Instantly Make Any Room More Inviting!

Monday, April 29, 2013
Are elephants warm and fuzzy? 
In a certain way, yes!
Friendly.

Lovable.

Approachable.

These are qualities that attract us to other people. So, it’s no surprise that the same qualities make a house attractive to home buyers. 

One of the best ways I know to make a room friendlier is to add reminders of nature.

Here are three ways to do just that:
  • Plants, real or silk ones.
  • A window with a garden view.
  • Natural lighting. 
And there’s another way to use nature to breathe life into a room: Animals, but not your housepets!

Here are some prime examples of how animal décor can make your home more interesting and lovable.

This sparsely furnished bedroom is the perfect setting for
some framed prints of English hunting scenes. Via Elle Decor
I'm partial to oil paintings of horses at rest.
This traditionally designed living room
gets an extra shot of class from
the painting. Midwest Magazine.
Bird art is always appealing. This one is a litttle
different, very attractive and modern. 

DIY art using animal graphics is easy to do, and can fill
wall space in a budget-staged home. Behr paints.

An elephant side table is timeless and crosses all
decor styles. They come in all sizes
and designs. I especially like this
glossy white one. Orange Beautiful. 
Another classic is foo dog ceramic ware.  
Feng Shui teaches that foo dogs offer protection.
This one stands guard and lights the way. Shades of Light.
Jungle animals and animals that people feel a
special kinship with are especially
good allies for staging your home.
Example: Monkey bookends. Apartment Therapy.

Almost any style of animal imaging -- if it's original --
works for home staging. Photo: Laurel Burch
    
Perhaps the most popular animal prints are the
leopard (above) and the zebra stripe.
One animal print per room is the usual rule,
but you can make your own rules! 
These Pottery Barn drapery panels feature
gorgeous bird designs, always
an attractive motif for home decor.
 
Don't forget your outdoor spaces.
This fish fountain sits on my back porch. 


While researching images for this post, I stumbled on some unwise choices, like glowing turtle lamps, owl placemats, and neon flamingos. So, beware the kitchy, overused, animal accents, and instead look for either lovable or exotic motifs. Stay away from less likable animals like snakes.

No unicorns, please. 

Pigs and chickens are iffy. 

Out of doors, be on guard against kitschy gnomes. 

One more caveat: don’t use real fur. If it’s fabric you’re after, velvet animal prints and faux furs are what you want. 

Sometimes staged rooms become too sterile. Using wildlife images and imitations can give rooms some animal magnetism and whimsy if you do it with style.  

If you need more inspiration and advice on staging your home so you can sell it, download my eBook, DIY Home Staging Tips to Sell Your Home Fast and for Top Dollar. Let me be your guide while you get your home ready for market.  


Why I Blog

Monday, April 22, 2013
“You have me mixed up with someone else.”

That’s what I would have said if you told me in 2010 that I would be writing a blog and books.

All these years and posts later, I think of myself as a blogger who publishes her own eBooks.

I love researching home décor topics, drafting and editing my blog posts, interacting with my readers, creating unique DIY projects for home staging, and photographing whatever I think will interest people staging their own homes.

This whole blogging idea wasn’t my own. It was my adult daughter who suggested it.

“Mom,” she said, “You really ought to write a book about home staging. I’ll help you get a blog up and running to sell it.” It sounded so simple.

Life lessons are everywhere

I did not know blogging would grow to consume so much of my attention and time. Any blogger knows what I am talking about. Most bloggers work hard. The truth about blogging is that, as my hairstylist from years ago, Mister Charles, told me about my hair, “Honey, the more attention you give it, the better it’s going to look.” Life lesson.  

My daughter knows me well. She knew I would embrace the challenge of self-imposed deadlines, and of creating original copy and images. She knew how I always loved making a home more livable, more beautiful. Every house we lived in was always being re-arranged and tweaked. On a shoestring. When I began investing in real estate, she watched how I turned properties no one else wanted into hot sellers.

I always looked forward to the next flip. And I always made money.


Although I had plenty of my own ideas, I also researched what home stagers, designers, decorators, color consultants, organizers, and remodelers had taught, and I put a more practical spin on all of that.

I added what I had learned in the construction industry, in the real estate field, in advertising and magazine editing, and in a lifetime of crafting, decorating, painting, gardening, and sewing. I didn’t pick this stuff up in a book. 

My staging books aren't glossy, full-color, hardcover books of eye candy. They're eBooks, so that means you can access it immediately as soon as you download it. You can read it on your computer.

You don’t need a Kindle or a tablet. You can print it if you wish, but the home staging one is over 150 pages, so you probably won’t print that one.

My books are full of nuts and bolts advice. Maybe some of it will be familiar to you. I give you all the professional shortcuts to effective cleaning and organizing. I give you foolproof formulas for furniture arrangements. I 
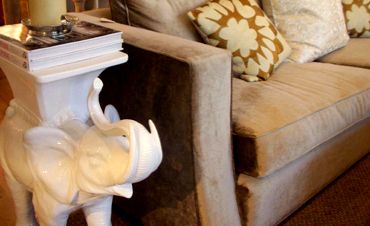
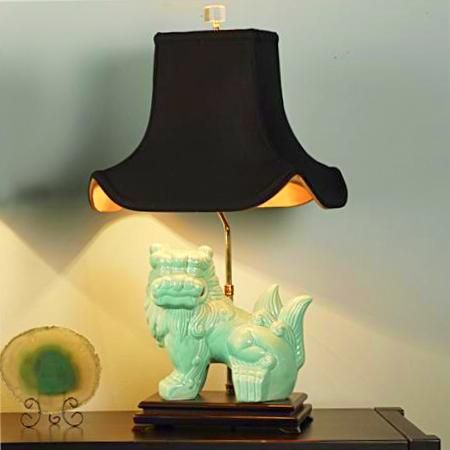
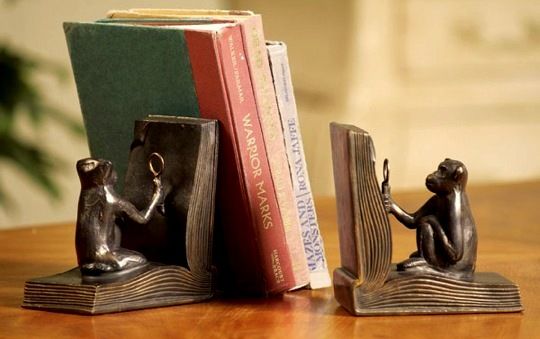
give you ideas for filling wall space, arranging furniture so rooms look big, making no-sew pillows, and creating the features that buyers want and need, that unlock your home’s hidden assets, no matter what your budget or decorating skills.

All for just $4.99!  That’s the price of each eBook. Talk about a return on your investment!

And for the record, I don’t ask you to buy power tools or have exceptional DIY experience. I don’t send you to Target and IKEA with a long shopping list of cute and trendy accessories. What I do give you is tips you don’t find elsewhere.  

Maybe you don’t need to read the pointers on hosting a profitable garage sale. Maybe you don’t need to know tips for selling an historic home, a mobile home, or a home on the water. Well, you can just skip those sections. The table of contents is hyperlinked to every section; jumping around in my home staging book is easy!

Here's what others have told me

"Just wanted you to know that we sold after 12 days on the market. Buyers wanted our house so much they didn’t quibble about the price or terms. What a blessing and a big relief. Thank you for putting us 'in the driver’s seat.'" – Harvey and Alicia B.

 I’m so glad I went ahead and downloaded your book. Thanks for making the advice you give so clear and well organized.  No wasted words or self-promotion! Love that!"  -- Katherine  S.

"I thought I knew how to stage my home because I’d watched enough HGTV. LOL. But I ordered the books anyway, because I like what I’ve read on your blog. I have to say, the book’s opened my eyes to what can be done without wasting money. These are really great ideas, ones that are practical and frugal instead of pie in the sky. I can’t hire a team of workers to stage my home. But now I know how to do it myself!" -- Paige Marie A.

"Barbara, I used your No Sew Window Treatment Book to make window coverings in three bedrooms, and everyone is really impressed with the difference they make, especially my Realtor.  These rooms needed draperies bad, but I didn’t have money for anything fancy. I followed your directions for using fleece to make ones that looked full and luxurious. I didn't spend much money or time!  I’m delighted.  Thank you, thank you!" -- Kim G.

"I’ve just done a quick look though the book I ordered, and I can see that I’ll be picking up new ideas on every page... just the kinds of things I can handle on my own to make my home show better… Now, I have a new boost of confidence that I’ll be able to get the price I want!" -- Andrea K.

"My house sold the first month it was on the market, and similar homes are not selling. I didn’t underprice. What made the difference were the simple changes I made after reading your book – arranging furniture, choosing paint colors, what to hide, what to show off, cheap decor, and too many other small tips that put the house over the top. Buyers were SO happy to have found a move-in ready property." – Shelly L.

"Congrats to you on a successful staging book. I read it cover to cover and learned all I needed to know to transform my condo into something sale-able!  I made more money that I ever made." -- Samuel G.

"…Should be required reading for all home sellers. I recommend it to all my (real estate) clients. Makes my job so much easier." Kelly M. 

"We were near foreclosure on our townhouse. We were desperate. We didn’t have a staging budget which I was told was needed if we wanted to get out and not lose our investment. The money we spent on your ebook saved us hundreds if not thousands of dollars. I was able to make improvements using your techniques (and I am not a handy or crafty person!) Happy ending, we got a purchase offer at the first open house. We close in three weeks. We can pay off my mortgage and have the money we wanted to move."  – Ari K.

"As a real estate broker, I won’t work with a seller who doesn’t buy your DIY home staging book. It fills a real need. I applaud your efforts, and I have seen the results!"  -- Charles P.

"I’ve been reading your blog in preparation for selling our home. It’s been an education for me because I’ve never sold a home before. My husband helped me get our house ready to sell, and sell it did after just three weeks. It looked awesome after following your rules. We hated to move, but we now have the money to buy our dream home."  – Crystal and Allen H.

"I’d recommend your staging book to anyone trying to sell a home. Competition is tough in our area, so we knew we had to outshine the comps…Your book showed us how, and we were able to do it on a tight budget. We were able to put the profits toward fixing our new home the way we want it. We’re even using some of the same ideas there, too!" -- Libby 

"My home was on the market for seven months, Not one offer so I bought your book I found out there were plenty of small things I could do to improve things, just little things that were keeping my house from 
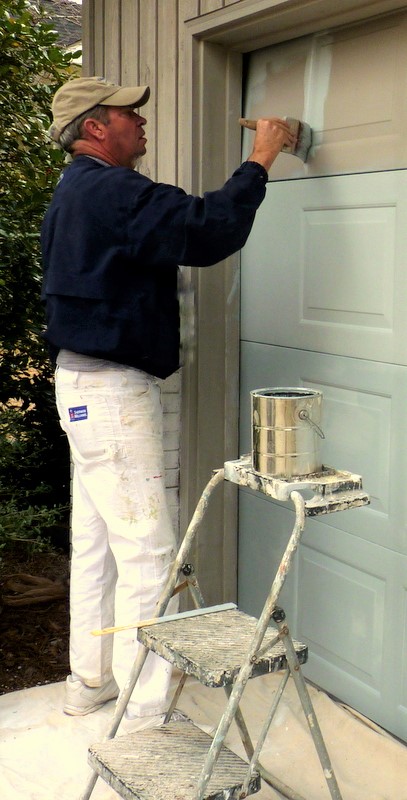
standing out. I made changes in each room. I painted my front door and updated the bedding. I rearranged some furniture. I boxed some things for storage. I was able to sell two weeks after I finished staging according to your suggestions.  -- A.M.J.

"I hate to move from my house now that it looks so nice! It's gorgeous, thanks to your book. We are closing next week." -- Melinda   

You could be next

These quotes above are from actual emails when readers took the trouble to write and tell me how much they appreciated the eBooks. They love to tell me when a home is sold! 
Would you like to be signing that purchase offer on your house soon? Would you like to relax, knowing that a buyer has fallen in love with your home? That you can move on to the next chapter of your life?


I have been there

I know what it’s like to wait for an offer, and I know that if you’ve staged your home with confidence, knowing that your home is all that it can be in a competitive market, the wait is easier. And the sale comes faster!

You could even leave the closing table with money in your pocket, because the right kind of staging is both frugal and profitable. Your home will sell for more money than your competition that isn't staged.

Think about it: every home is already staged, whether it’s intentional or not. If your intent is to sell your home and to stage it yourself, you need my eBook.

I love to text my daughter every time I sell another eBook. She knows how proud I am of both my eBooks. Almost as proud as I am of her. Okay, that’s an exaggeration.

Go here now to instantly download both of my books. And let me know when you sell your home, so I can add my personal congratulations to you on a job well done. That’s why I blog, for you and for myself.

DIY Project: Overhead Garage Door Re-Paint

Monday, April 15, 2013
Whether you like it or not, a street-facing, overhead garage door takes over a home's facade, forcing itself into the role of focal point.

The front of a typical double garage often takes up a third of the typical ranch home's face.

For this reason, if you have a garage door that needs attention it shouts that your whole home needs attention.

You may not be able to paint your home's siding yourself, but anyone can paint a garage door. And a new-looking garage door goes a long way to boost your curb appeal.

I've painted many garage doors. This time I stood back and took photos while my dear husband painted a client's. Here is the step-by-step to help you do it yourself.

There's a right way and a wrong way to DIY a garage door repaint.

The wrong way takes hours, makes a mess of splatters on the concrete, and leaves gaps of old paint color at the ends of the panels when the door is opened. Here is the right way.

As with all DIY projects, having the right tools and supplies is the first step to getting good results with the least effort. So, gather these materials.
  • Exterior paint 
  • A clean 1-gallon work bucket. 
  • 3-inch latex brush
  • Stir stick
  • Sanding sponge
  • Old brush for dusting
  • Rags
  • Dropcloth
  • Step stool
  • 5-in-1 tool or paint can opener  

How much paint?

The amount of paint you'll need depends on a few factors. An aluminum door (most today are aluminum) will need less paint than a wooden door. If you are repainting the same color, you'll need less paint than if you are drastically changing the color. And, of course, if the garage is a single, you'll need less paint than a two-car garage door needs. Whether you have glass panels in the door, or not, isn't really a factor.

So, unless you are painting a single car garage door the same color, I would suggest that you buy a gallon of paint rather than a quart. When you buy a gallon, it's like getting a quart free because of the price break. You're likely to find other uses for the paint. You might want to freshen your exterior trim if it is the same color, some shutters, a planter or window box, or some outdoor furniture.   

Painting an overhead garage door is a whole lot easier than painting a front door. But some of the same cautions apply: Choose a windless day that's not too hot or too cold, and when you can work without distractions and interruptions. (Moms of young ones, take heart. In the time it takes a toddler to have his afternoon nap, you should be able to start and finish.)  

Ever notice that hanging pull on your garage ceiling? If you tug the red handle,
you'll disengage the electric opener. That's what you want. Now you're ready to
move the garage door up and down manually from outside.
Inevitably, the garage door will have dust, dirt, cobwebs, and oxidized paint, so you'll want to
clean it. The easiest way is to take a sanding block to the entire door.
Push the door up and down manually to quickly go over the whole surface.
Pay attention to the gasket on the bottom edge so no dirt gets in your paint.
Remember that you're not painting an interior piece of fine furniture,
so the surface doesn't have to be perfect. 


                 Use an old paintbrush or a rag to get rid of dust and dirt stirred up by your sanding. 
Then place a large dropcloth under the partly raised door to protect both the driveway and garage floor. 

Use your stir stick to stir the paint, even if it was shaken at the paint store. 
Pour only a quart into a clean work bucket, like an empty paint can. 
Wipe the lip of the original can, replace the lid tightly, and set it out of the way.  


Begin brushing the door at the bottom. Move the door up manually
so you are not stooping over to paint. Do not paint the gasket on the bottom edge
unless it was painted previously and needs a repaint. 


Paint just one lengthwise hinged panel at time. Paint the extreme ends of the panels 
as best you can. If you plan to paint the trim surrounding the door, 
you don't have to be fussy about keeping paint off the trim. 

It's easier to paint the extreme ends of the panels when they are at the very top 
of the door opening, as above. You'll have to reach up or use the step stool to paint the them.  

  When the panel you've finished is at the top of the opening, paint the edges of 
both the upper and lower panels, the "lips" where they meet. 
Since this area does not receive much direct sun or weather, 
it's not necessary to go heavy with the paint, so do not load your brush. 


When you get to the top panel, make sure the drop cloth covers the ground 
before lowering the door. Use a step stool to stand on rather than stretching to 
reach the top panel. Check the entire door for runs, drips, and misses. 


Now's the time to paint the trim around the door. This homeowner chose to have the 
siding, the trim and the overhead door all the same color. It's a contemporary, no-nonsense look 
that is fine for modern homes.  
Next week we'll spray her brick foundation white, and brush the siding grey.  

The finished door looks like new. Painting the door took about an hour. 
If your door needs two coats for good coverage, 
you could put on a second coat the same day if the first coat is 
thoroughly dry. Or just wait until the next good painting day. 


Would you refresh your own overhead garage door with paint? There are plenty of simple staging tricks and secrets that are even simpler than this in my home staging pdf. Put your home to work for you! You can download my eBook DIY Home Staging Tips to Sell Your Home Fast and for Top Dollar right now and begin making your home the one that real estate buyers want!


How Not to Photograph Your Home

Monday, April 08, 2013
Your home's profile shot has to 
win buyers from the get-go. 
When people shop for a home, they usually begin their search online, either on their own or with a Realtor. 

If your web photos don’t do your home justice, you could be out of the running before buyers even check out your curb appeal with a drive-by.

Have you looked at your web listing?

You’ve worked hard to get your home in good shape, organized, cleaned, and staged. 

Do the photos capture all the major selling points of your home, or do they skip some of its best features? 

Do they show your home in the best way, or are there some slip-ups?

Here’s a checklist of what can go wrong when your home is photographed.

Out-of-season picture 

Although you may prefer the colors in your autumn profile photo, it’s springtime now. The message an off-season shot gives buyers is that the home has been on the market for a long time. Buyers assume there must be something wrong with it. If your Realtor won't take a new photo, perhaps you have or can take an image of your own that is current or seasonless.

Duplicate shots 

This is a common mistake and I don’t know why. A listing will include three photos of the kitchen, or four photos of the backyard. Buyers don’t have to see a room from multiple angles. 

Choose the photo that flatters the room the most. Your photos should be complete, yet tease buyers to come and see more.
Notice how the photographer shot this 
kitchen from the height of the counters. 
This means you can see both
the floor and the ceiling. Photo: BHG

Missing rooms

Buyers want an overview. Give them a room-by-room sampling as best you can. 

Omitted rooms are a red flag to buyers. Some Realtors have to pay extra for extra photos, so if you are forced to choose, choose the important rooms: kitchen, living room, dining room, baths, and master bedroom.  Always include an exterior picture.

Flash

If a professional photographer takes your photos, he’ll have the camera to do the job with natural light, in-home lighting, or lights he brings to the job. 

If you or your Realtor take photos, turn the flash off. A flash illuminates only a few feet in front of the camera, and it leaves harsh shadows.

The flash is not your friend. If you are working with a point-and-shoot camera or older smartphone, you might need to do some photo editing to help the pictures along after uploading them.

Wrong angle

Good lighting and the proper angle are the two most significant ways to make your home photos look better. 

Inside, the most common mistake amateurs make is to shoot from too high a level. Crouch down to get a more interesting view. 

Outside, move around your home’s front and shoot multiple times. Shoot high and shoot low. Shoot from the left side of the house and from the right, even at different times of the day, and then choose the picture that makes your home look the best.

This split-level home looks okay in the photo, but a little too boxy, small, and dull.  
But when I moved to one side to take another picture and shot 
from a lower position, the building looks more interesting.

People or pets in the room

The message buyers get when they see people relaxing in the home is that you were in such a rush to get your house photographed that there was no time to ask people to step aside. It’s an affront to the buyer. 

Homebuyers do not want to see people in these rooms. Pets in photos are a distraction as well. This apartment listing on Craigslist went viral because the owner's dog photobombed every shot, but I can't recommend that approach to get people noticing your listing!

Empty room

Of course, this blog is about home staging, so I never recommend a home be shown with empty rooms. A photo of an empty room is sad. Usually, it’s all flooring and blank walls and windows, giving no indication of size or possibilities. 

DIY home staging is not rocket science and does not need to cost you big bucks. Stage your rooms.

What's wrong with this picture? For starters, 
the photographer is reflected in
the mirror. Also, she's using a flash. 

The picture is crooked. It's not cropped.
The room's not staged, and the lid is up!

Signs of ordinary life

It’s appalling how many MLS photos show laundry, toiletries, stacks of paperwork, garbage cans, and cars parked in the driveway. Tweak your home for its photo op. It takes only a moment to stash the pool toys, hide the cosmetics, and put the lid down on the toilet.

How to fix

Does a review of your online listing tell you that the photos fall short of what they could be? If so, you have a few options.

Talk to your Realtor about improving the images. If you are selling your own home FSBO, replace the offending photos with better ones. Whatever cost and effort it takes are worthwhile. Your photos are your front-line salespeople. They can be deal-breakers or else what gets people excited to see your home.  

Replacing poor photos could mean that you need to spring for the cost of a professional photographer. What that will cost depends on where you live, the experience of the photographer, and how many photos you need.

Or, you might have a friend who has the camera, the eye, and the experience to do the job gratis. If you take the photos yourself, edit them. I use Picasa for all my photos and the simplest techniques always improve them. So straighten, crop, brighten the colors, and increase the contrast as necessary. It’s easy. Get help if this editing task is overwhelming.

Maybe your listing has enough photos of your home to whet the appetite of home buyers, and you still have the opportunity for additional photos. More than 50 photos is def overkill. But don’t be shy about adding photos from other online sources. If you can grab a photo of your charming downtown, or the community pool, the local golf course, an annual festival, or whatever makes your town or neighborhood special, go ahead. Stay within bounds, however, because too many generic shots will make it appear that your home itself has little to offer.

Photos speak louder than words. Make sure your photos tell buyers how desirable your home is.

For more tips on making your home attractive to buyers, download my eBook, DIY Home Staging Tips to Sell Your Home Fast and for Top Dollar. It’s one sure way to be successful at staging your own home. 


How to Beautify an Ugly Microfiber Chair with Paint

Monday, April 01, 2013

This is not an April Fool's joke. I really did convert an old microsuede chair into six different versions of itself. 

I know you can buy fabric paints, but I wanted to see if you could use ordinary latex wall paint to change an ugly chair into something suitable for staging.

The answer is a definite yes.

Can you use this method to overhaul all the upholstered furniture in your family room and give it another five years of daily service? No.

But it is a quick, simple, and thrifty way to rescue furniture that is the wrong color, mismatched, stained, or faded, into furniture that looks fresh and clean enough for a staged room that doesn’t get much use. We're not talking heirloom quality here. We're talking home staging.

Here is what I started with. A friend was planning to haul this chair to the landfill, when I intercepted it for my test. It was a sad-looking tawny brown, kind of like a shy puppy at the dog pound.

Microfiber upholstery is okay, but this chair wanted a facelift.

My first step was to brush the surface with a stiff bristle brush to remove loose dirt. You could do this outside, or inside with a vacuum.  

I knew that stains could bleed through the latex paint, so I examined the fabric for marks made by crayons, marking pens, grease, oil, or wax. My chair was stain-free, but if you see stains, give those nasty spots a quick hit with a spray of Kilz oil-based primer.

I always start a painting project upside down. I flipped the chair over and painted the bottom edge. I used a light blue flat paint and a two-inch latex brush. I didn't thin the paint, or add fabric medium to make the dried paint more flexible. 

It's easier and more efficient to start painting
the chair upside dow
n.
 

Once the bottom edges were painted, I set the chair right side up and painted the remaining fabric. Don’t worry if your fabric looks splotchy. Chances are most fabrics will require two coats. Give it eight to 12 hours to dry thoroughly.

The first coat dries unevenly, but it's just a primer.

The first coat might activate some stains that were not visible to begin with. If you see bleed-through, give the spot a shot of your Kilz stain-blocking spray. After a second coat, applied exactly as the first, I was pleased to see the coverage looked even. 

I didn’t like the cheap metal legs on this chair, so I painted recycled tin cans and slipped them over the legs. Then I wrapped the chair’s four decorative buttons in a slightly darker blue taffeta. I didn’t remove them, just laid a circle of fabric over the top of the button, and tucked it snugly around the edges.

I don't think anyone would guess that this 
pretty chair is painted microsuede.

I actually lived with this chair as a side chair in my office/studio for a few months, so it did get some sitting on and feet-propping. The fabric doesn’t flex as much as it would with fabric paint, but it didn’t feel really stiff either. In fact, it felt smooth and pliable, like leather. It helped that my chair covering was snug, not floppy like some microfiber upholstery. 

Phase two of the experiment was to paint a design on the fabric. I used a light blue highlighter pen to freehand draw the design onto the painted fabric. It would have been easier to have selected a more free-form design, but I really wanted the illusion of ikat. You can see the results of that project in the top photo.

Next, I painted the chair all white and ran washi tape around the seams to suggest contrasting piping. I unscrewed the legs, painted them green, and replaced them. It did take two coats of a brushed-on white primer to cover the highlighter, but the fabric still wasn't buckling or cracking under all that paint.

When I took the washi tape-trimmed chair outside 
for its photo, my friendly backyard gecko wanted 
to get in on the session.  

Then, I converted the legs to bun feet by covering them with burlap puffed up with some pillow stuffing. I removed the washi tape and simply draped a scarf over the chair. You can't get any simpler than that, yet I really liked the look. I pinned the scarf at the corners with white dressmaker pins that were hardly visible.

I liked the ethnic feel of this version. But if it would 
look wrinkled soon if people sat on it, 
always a possibility during a showing. 

I wasn't ready to give up on the chair yet. As an additional test, I covered the seams with some white plastic cording designed for making piping on outdoor cushions. I just hot-glued it on. This piping definitely bumped up the style factor and made it look more like a white leather chair.

I made cones of vinyl grasscloth-style wallpaper
to slip over the metal legs of the chair. 
It's amazing what a glue gun and paint will do!

Since I was having so much fun, I decided to print an all-over design, using a cork from a wine bottle as a stamp. I dipped it in black paint and pounced the circle design all over the chair. I did not fuss with precision placement, but printed in a fairly random pattern. It took about 30 minutes.


I might like this version the best. It's the most decorative, and black and white patterns in fashion and furnishings are trending right now.

I’m pleased with how easy and frugal it was to transform a plain microfabric side chair into a handsome addition to a staged room. I think this technique holds possibilities for staging vacant homes or seldom-used rooms, rescuing furniture you own but don’t like, or second-hand furniture you’ve bought for a song. If you have some microsuede upholstered pieces that are the wrong color, or just need some refreshing for staging, paint them!

Are you looking for other attractive and thrifty ways to stage your home for sale? Download my eBook, DIY Home Staging Tips to Sell Your Home Fast and for Top Dollar, and you’ll have all the tips and formulas you need to make your home look better to home buyers.

Popular Posts