
You say you want sassy-looking pillows? But you don't want to invest much money in them? As always, DIY is the answer.
You're smart to include pillows in your arsenal of props if you're home staging.
Pillows can give a bland room some texture, color, and personality.
They add the finishing touch that bumps a room's style quota up a few notches.
Plump and pretty pillows can soften the look of a room, making it feel comfortable and welcoming –- important goals when you stage a home.
Bigger is better
For pillows to have impact, they need to be large. I like pillows for staging to measure at least 18 x 18 inches. I like the covers to be removable for washing or replacing with a different cover. I like them to look as luscious as the versions I see on designer's online portfolios, and in the shelter magazines. And I like them to be easy to make so I can whip them up on a whim.
But I don’t want to shell out much moolah for them.
So, here is how I make pillows for staging.
 |
| Use drapery or upholstery weight fabric for pillow covers. Prewash the fabric to prevent shrinkage later. |
To save money
Make the pillow insert yourself from recycled fabrics, like pillowcases, sheets, or towels. Bed pillows that have gone flat can be washed, taken apart, and the stuffing used to make new throw pillows. Free.
For the pillow itself, you can buy gorgeous remnants and upholstery samples at discount prices in most fabric stores. Another source of cheap fabric is second-hand stores, including the blankets, curtains, and even shirts and dresses sold there.
If you have enough fabric to cover the front of the pillow, save money by using something less expensive for the back.
If you’re an experienced sewer, you can piece together scraps of fabrics to make patchwork pillows that look stylish. Patchwork doesn’t always mean looking like grandma’s quilts.
And, my favorite money-saver is to stuff the pillow insert with junk mail or old tax returns that you’ve run through your paper shredder. This free filling holds up well, has a good loft and weight, and has no off-odors. Trust me; my dog even sleeps on a bed I made that’s stuffed with shredded paper.
Today's lesson
I’ve chosen to demonstrate the flanged pillowcase with an envelope back, because it fits all my criteria. It’s easy to make, and the flange gives it some style without the hassle of stitching piping into your seams. Besides, flanged pillows are on-trend right now.
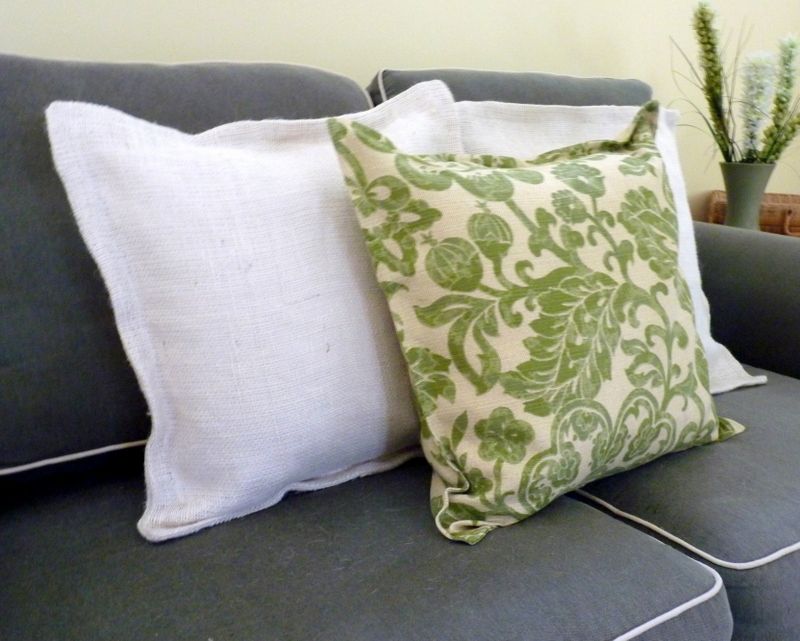 |
| All three of these pillows started with a simple insert, filled with shredded paper. The two back pillows are made from white burlap, surprisingly easy to sew. |
Make the insert
Decide how large your pillow will be. Make the insert a few inches smaller, because for a flanged pillow, the insert fills only the center, plump part of the pillow, the part inside the flange.
How wide the flange will be depends on the size of the pillow and the weight of the fabric. The smaller the pillow and the floppier the fabric, the narrower the flange should be, from ½ inch to 1 inch. For a large pillow or a stiff upholstery fabric, the flange can be wider, up to 3 inches. I decided on a ½-inch flange for this pillow.
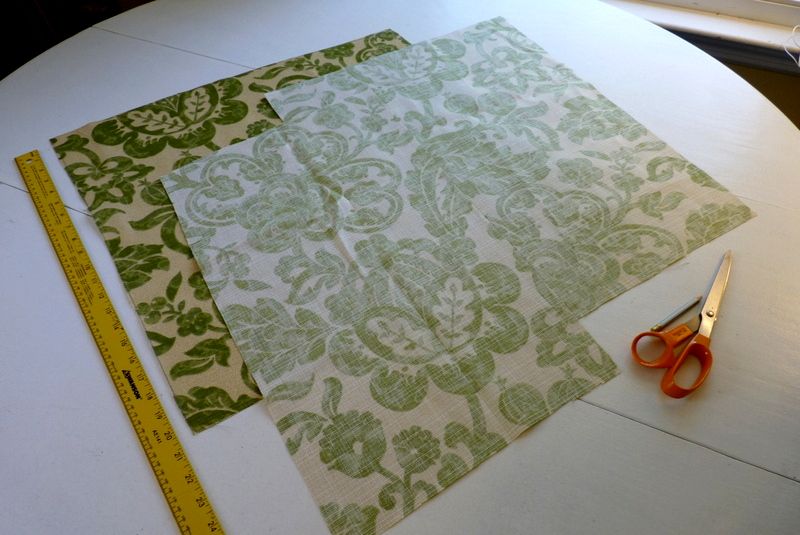
Cut the fabric
For a pillow insert that measures 19 x 19 inches once finished, cut two squares 20 x 20 inches, to allow for ½ inch seams all around.
Since I was recycling an old bath towel, I just folded it in half crosswise, and trimmed it so that once the seams were sewn, it would measure 19 x 19.
Once three side seams are stitched, fill the insert with shredded paper. When you think you have stuffed it enough, add some more stuffing for good measure. Then hand stitch that last side seam.
 |
| It took almost one whole grocery bag of shredded paper to fill my 19 x 19-inch insert. |
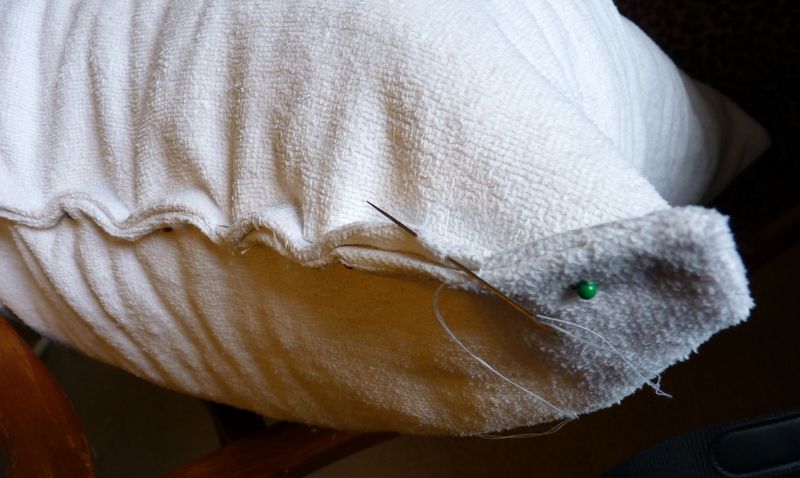 |
| Use a slip stitch to seam the fourth side of the insert. |
Make the pillow covering
Before cutting any of your good fabric, study the fabric. Some forethought and attention to detail at the start of your project will give your pillows that custom look instead of that discount store look.
A well-made, store-bought, high-end pillow will match the design at the seams. A flanged pillow is more forgiving because the flange can hide the fact that your pattern doesn’t line up on all four sides. But, do take note if your fabric has one large design. Center this design.
Cut out the front
Cut the front piece of your pillow the size as your pillow insert cover, plus whatever measurement you want for a surrounding flange, and an allowance for seams. I made my front piece 21 x 21 inches because my insert measured 19 x 19 inches, and I wanted a 1 ½ inch flange and ½ inch for seam allowance.
The back of the pillow will be in two pieces, with an overlap in the center so that removal is easy.
I like the overlap to look centered, not off to one side of the pillow’s back. So, I make one of the two back pieces larger than the other, so it can slide under the shorter piece.
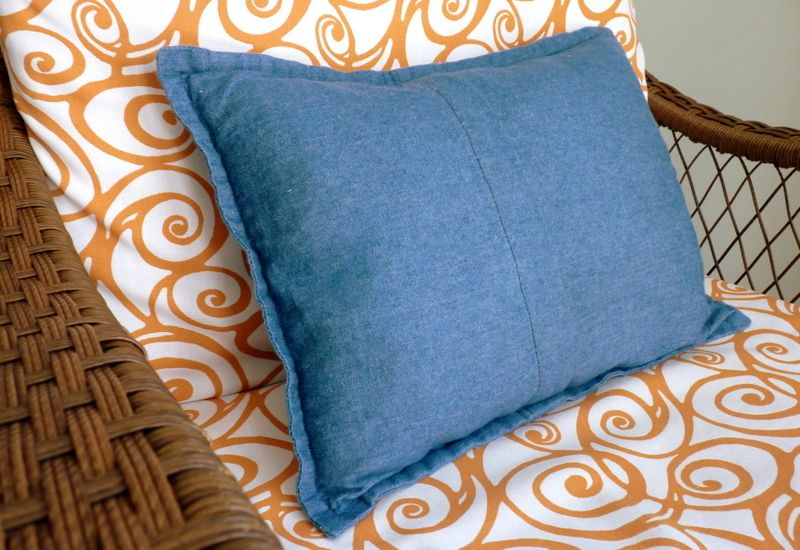 |
| When you center the hemmed envelope edge, even the back of your pillow is presentable, like this blue denim pillow. |
I usually figure an overlap of at least four inches. There will be times when your pillow gets viewed from behind, so both sides need to look presentable. You don’t want the appearance of a pillow that has gained weight and is still wearing the same old clothes, underwear peeking out from overstretched openings. So, four inches of overlap for an average sized pillow, and even more overlap for larger pillows.
Cut out the back
First, cut the shorter back piece. Make it as long as the front piece (21 inches in my example). But make it only half the width of the front piece, plus two inches for a center hem. My first back piece measured 21 x 12 ½ inches.
Cut the longer back piece. Make it as long as the front piece (21 inches). But make it half the width of the front piece, plus 2 inches for a center hem and 4 inches for overlapping. My second back piece measured 21 x 16 ½ inches.
 |
| This is what your three pieces of fabric will look like. The front piece is facing up, and the two back pieces are facing down. |
Hem the back pieces
Hem the edges of both back pieces that will form the opening. In my example, that would be one of the edges that measures 21inches. On each of the two back pieces, I turned one edge over 1/4 inch, stitched it, then turned it again 1 3/4 inches and topstitched that. A hem this wide will lie nice and flat. Alternately, you can zig-zag or serge the first turn of the hem.Attach front to back
With good sides together, stitch the smaller of the two back pieces to the front piece, with the hemmed edge of the back piece towards the center. Then, stitch the larger of the two back pieces to the front, overlapping the other back piece.
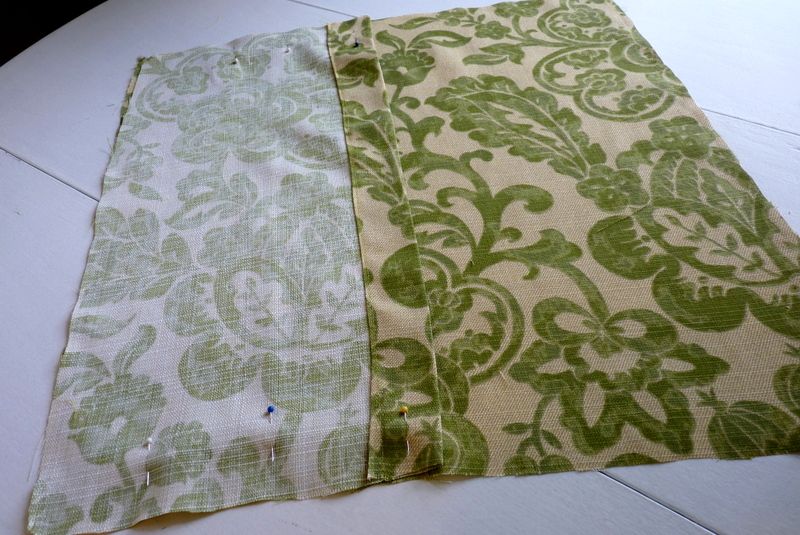 |
| Joining the shorter piece to the front first means the hemmed edge will be centered. |
 |
| If your fabric has a loose weave, zig zag the raw edges to prevent unraveling with use. |
Trim the corners so they will be crisp and square when you turn your pillow cover right side out. Turn the cover, and press the seams flat. Finally, top stitch around the edge to make your flange. I always pin first, so I’m sure the flange will lay flat and there will be no surprise puckers when I’m machine stitching. If the flange is wider than ½ inch, marking the stitch line with a quilter's pencil makes it easy to stitch straight and even all around. On a narrow flange, you can usually eyeball as you stitch.
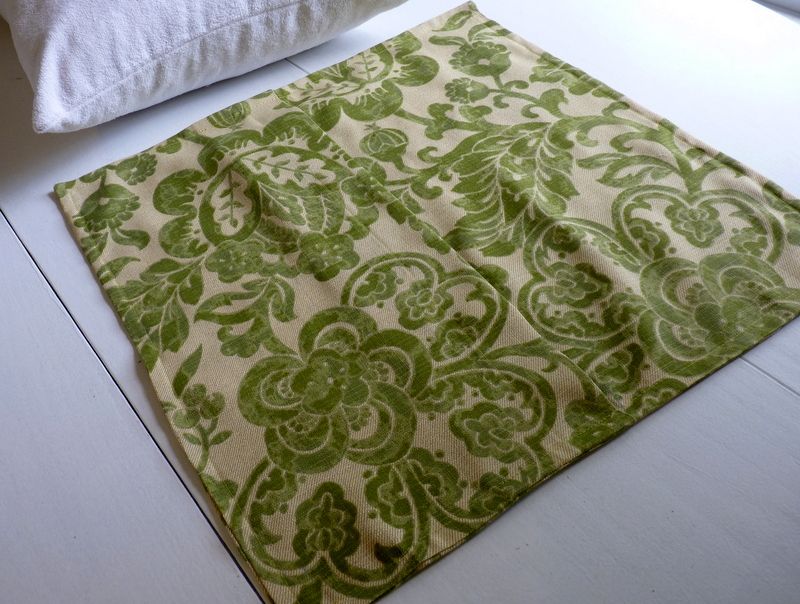 |
| Press the fabric at each step of the assembling for a more finished look. |
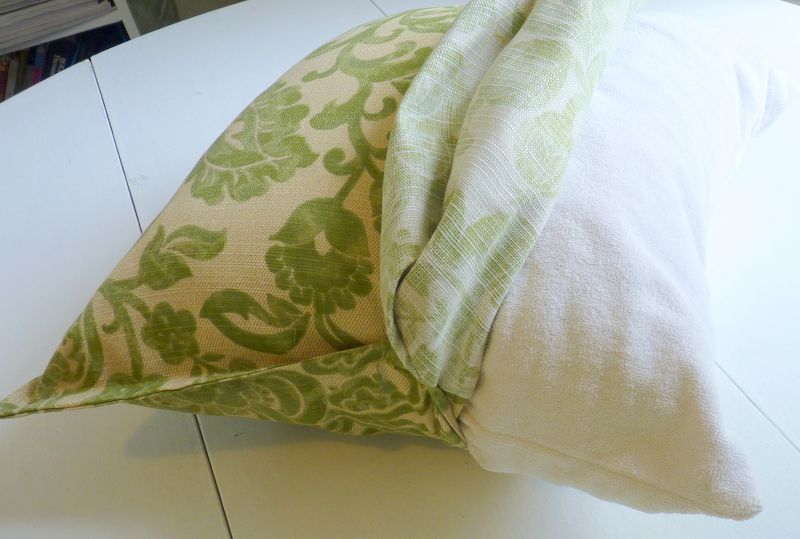 |
| To make it easy to stuff the insert into the case, flip one side of the envelope back, push the insert into one side, and then the other. |
 |
| Some people believe pillows should be under-stuffed for a more casual or natural look. It's up to you which style you like. Both look good with a flanged border |
Variations
Stitch something sweet. Top stitch your flange by hand for a dressmaker touch. If you are a quilter, this should be a piece of cake.
Add an accent: Top stitch your flange with a contrasting thread.
Decorate with tim: Sew ribbon, rick rack, ball fringe, or other decorative edging into the edge of the flange.
Give it high style: Add buttons to the four inside corners on the front of the pillow.
Have some fun: Make oblong, and even round pillows, with flanges.
Be versatile: Choose one fabric for the front and another for the back of a pillow.
Go no sew: Substitute fusible webbing or fabric glue for stitching.
Hack the big guys: Paint an image on the front of your plain pillowcase, copying from something you've fallen in love with online.
Hack the big guys: Paint an image on the front of your plain pillowcase, copying from something you've fallen in love with online.
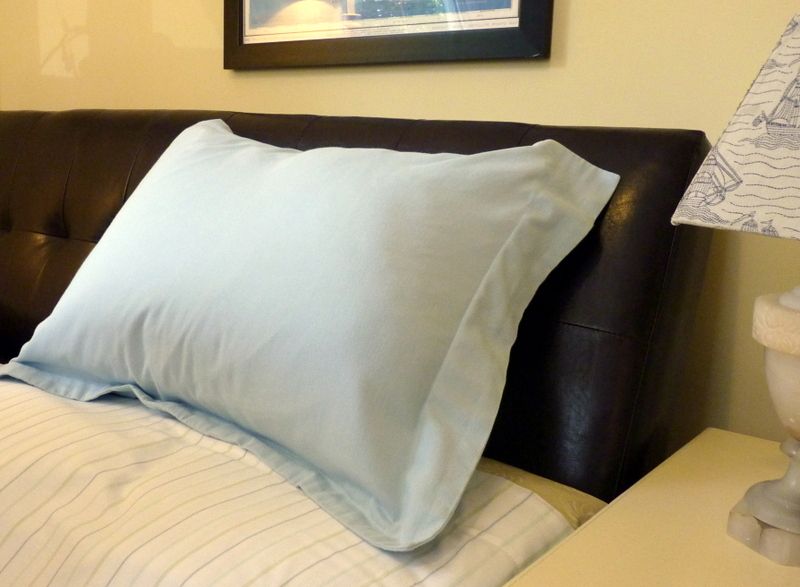
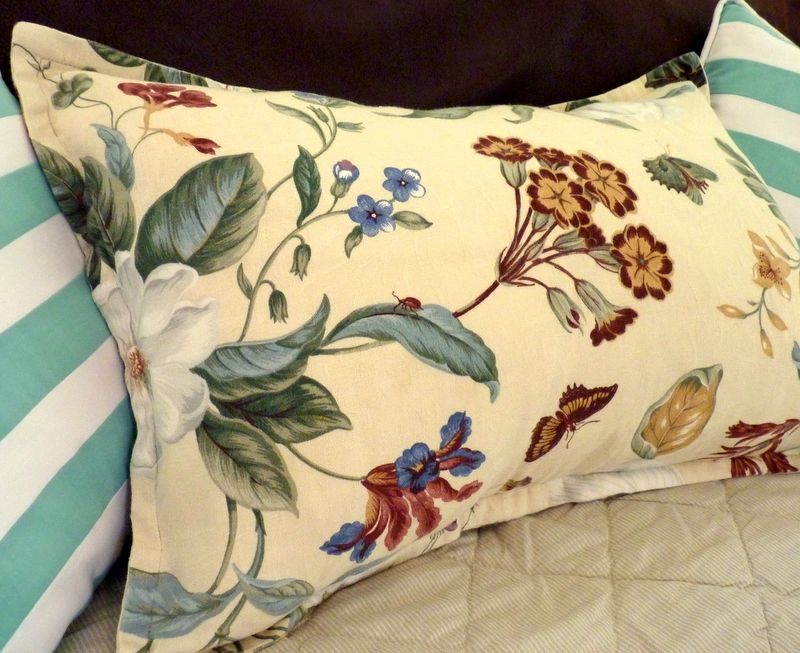 |
| All you need is one yard of fabric to change a regular bed pillow into a decorative accent pillow like this. The striped pillows are made from scraps of fabric. |
If your home is for sale, count on pillows to be part of on your selling team. I hope these instructions encourage you to make your own frugal decorator pillows.
Got windows? My eBook, No-Sew Curtains and Draperies to Stage Your Home is packed with illustrated tutorials for 15 different window treatments, ones I've especially designed and used for home staging.
Got windows? My eBook, No-Sew Curtains and Draperies to Stage Your Home is packed with illustrated tutorials for 15 different window treatments, ones I've especially designed and used for home staging.
