Setting Goals -- Six Steps That Get Results

Monday, December 26, 2011
I used this silly photo to remind me of the life I wanted.

Is selling your home one of the goals you hope to accomplish in the new year?

If so, can we talk? I want to share with you what I know about setting goals.

When I met Mr. Lucky in 1990, both of us were starting over, refugees who had fled failed marriages. He was living in a campground in a $3500 camper, working for someone else for $10 an hour. I was earning even less, and paying $250 a month for my rental apartment, which was basically half a doublewide trailer.

But both of us had lived in better circumstances and knew we wanted a better life again. Even before we married, we set mutual goals and together we have created a satisfying lifestyle, more comfortable and more interesting than we ever imagined.

We decided that our path to financial freedom would be through real estate investments. We had the skills and determination, so we set specific goals. We wrote these goals down and read them aloud to each other each evening.

We quit our jobs and went into business as painting contractors, something Mr. Lucky had been doing for 10 years. He trained me, and soon we were employing others and handling large accounts. Evenings we studied how to buy and sell properties, how to negotiate prices, how to calculate fix-up costs and interest rates, and how to find and keep good tenants. Midday we listened to audio tapes about real estate investment as we ate brown bag lunches in our work van. We joined a real estate investors club and listened to speakers, borrowed books, and attended seminars.
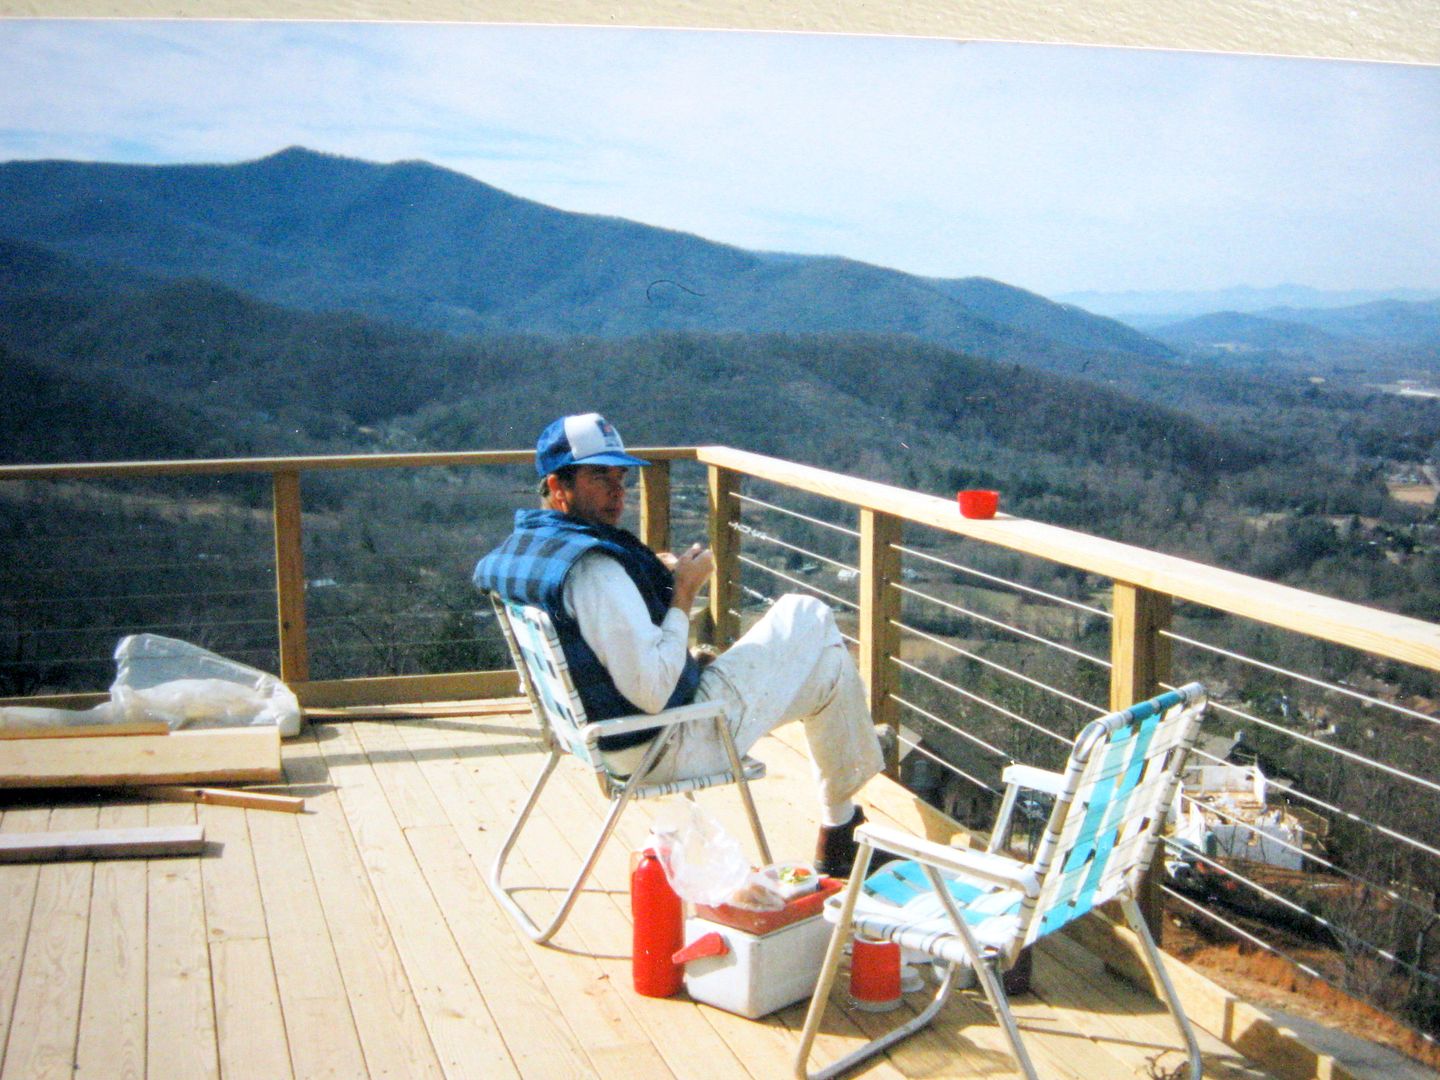
On some jobs, the lunch break gave us a distant view. These are mountains near Asheville, NC.
In a year’s time, we had enough savings and education to start buying houses, fixing them, staging them, and selling or renting them. Today, we are completely debt-free, and depend on our rental properties to support us.

I’m not an authority on how to set and reach goals, but I know what has worked for us, and I also did my homework for this post. Here’s what the experts say.  
   

Step 1.  Look at the Big Picture

Double-check that your goal -- selling your home -- is really what you want. If you’re not on board with the idea, or if your entire household isn’t supportive, the path will be uphill.

Make sure your goal doesn’t contradict other goals you have. I knew that investing in real estate did not compromise my ethics or my dedication to my family or health. Will the sale of your home support or undermine the other important expectations you have in your life right now?

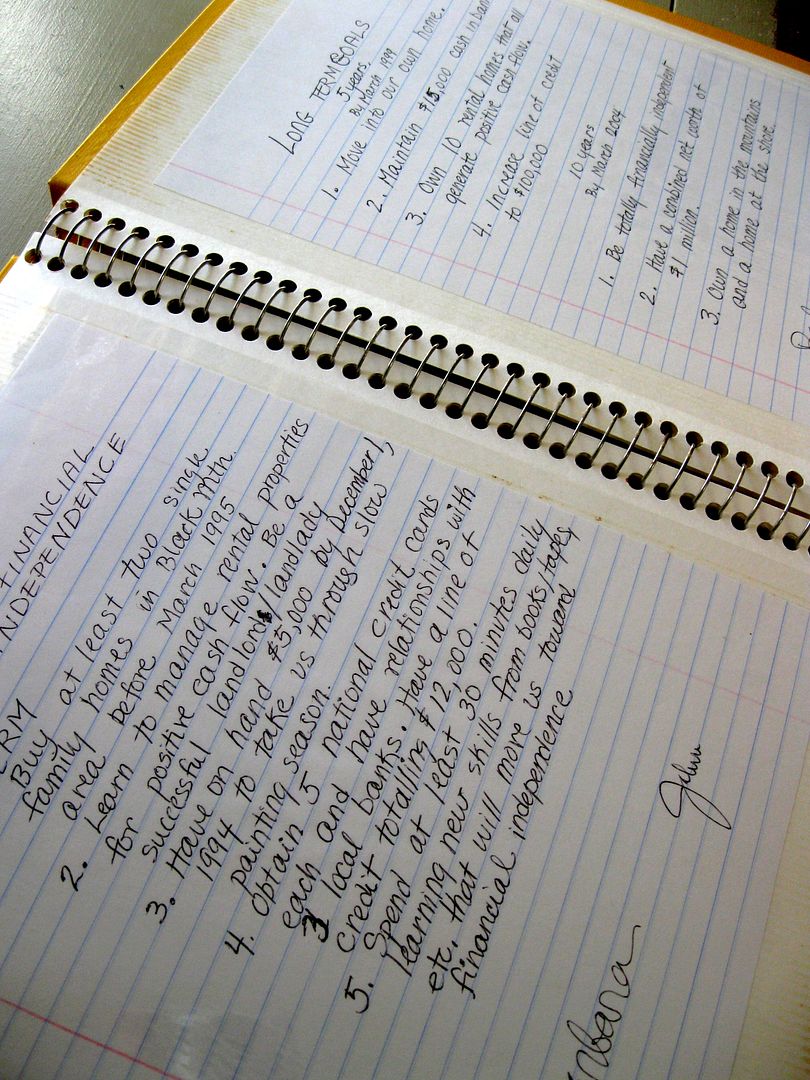
This is our notebook we reviewed daily.

STEP 2. Write and Recite Your Goals

When you see what you want spelled out on paper, your subconscious begins believing! You can carry this visualization even further by describing in detail what you want, and even collecting pictures of your goals. Pinterest is terrific for doing this. Twenty years ago, I chose clippings from magazines to represent what we were working for, and put them in a cheap photo album, photos of dreams that are reality today.
         
Be positive rather than negative when defining your goals and new year’s resolutions. Instead of writing, “I will not sleep late on Saturdays,” write, “I will use each Saturday morning to deep clean a different room.” If you have low expectations of yourself, recite positive affirmations such as, “I will be happy with less clutter in my life.” A proactive state of mind is indispensable to achieving success.    

Be realistic. Educate yourself about how quickly homes are selling and at what prices where you live. Work with your Realtor to establish fair market value, based on proven formulas and statistics.

As an example, Mr. Lucky and I knew we couldn’t buy spacious four-bedroom homes as investments. Our first property was a one-bedroom home. But it came with enough land that we were able to subdivide the lot, and have a new house built on the property, which we sold for a handsome profit. Life is full of happy surprises when you begin with realistic expectations.
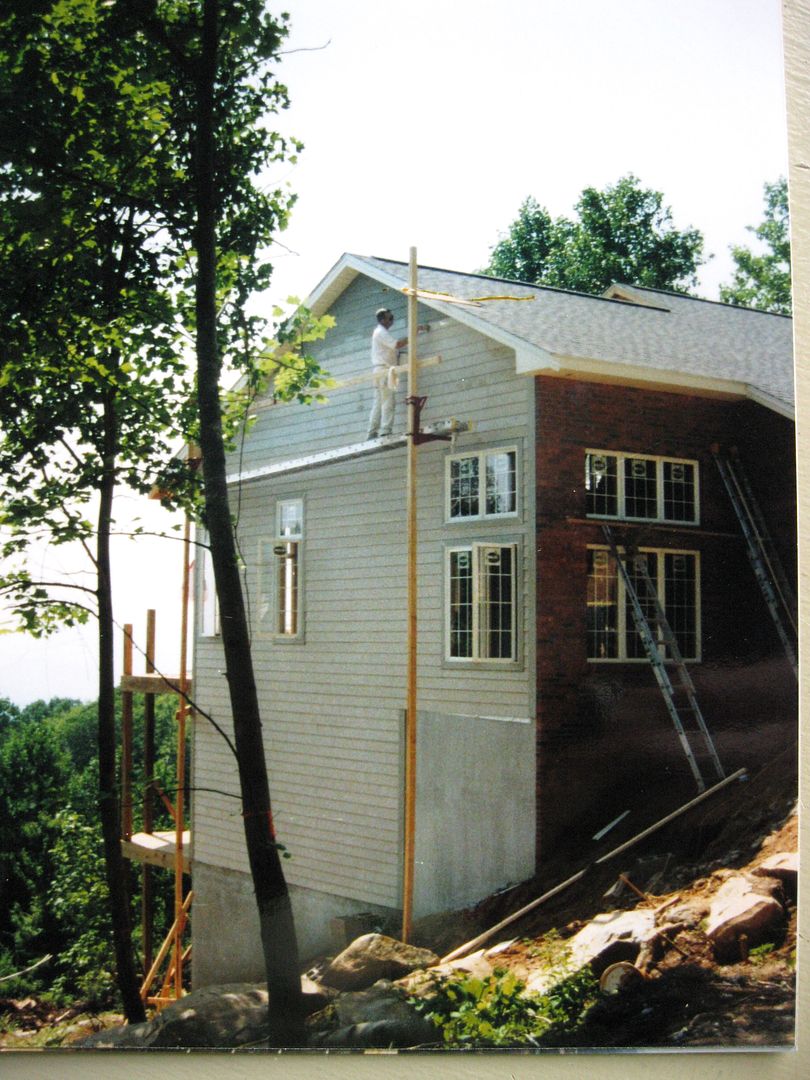
Mr. Lucky painting a home under construction.

Step 3. Define What Needs to be Done

List the steps to reach your goals. In our case, we knew we had to have a certain amount of money for a down payment on our first property. We knew we had to cultivate a relationship with a bank. We knew we had to build a good credit history so we could qualify for a mortgage.

List whatever you need to do to get your property sold.  This list might include:

  • Call a Realtor.
  • Write down what is especially desirable about your home, and what doesn’t work for you. Then, determine if any of these problems can be fixed.
  • Start your cleaning and de-cluttering process.
  • Download my eBook, DIY Home Staging Tips to Sell Your Home Fast and For Top Dollar, to learn all the ways staging can help sell your home, and the easy steps to staging frugally and effectively.
  • Let friends and family know you plan to sell.
  • Study the area you plan to relocate to, whether across town or to the other side of the globe. You’ll have a better handle on what’s ahead and what you need to bring from your present home.
  • Examine the skills you have and consider how you can use the tools and knowledge you have at your fingertips.

Step 4. Divide Your Goals into Smaller Goals

Break larger tasks down into smaller steps. Be specific. Logically organize the things you need to do in order to be efficient. For example, if you plan to replace the doorknobs and hinges in your house, first get prices online, then read how to do it, then purchase what you’ll need, then set aside one morning to do it.

Small steps make even the overwhelming jobs doable. Once underway, many tasks take on a life of their own. Often you will amaze yourself by what you are capable of doing if you just take the first step, then the next one, then the next one…

If anyone told me, shy and easily intimidated me, 20 years ago that I would be able to manage my own rental properties, I would have laughed at them. Now, being a landlady is easy and enjoyable! Baby steps.

Step 5. Set Deadlines for Your Goals

Make a schedule for all your goals and tasks. Review similar projects you’ve tackled in the past so you can give yourself deadlines that make sense. Deadlines keep you focused, and on schedule. And they provide a sense of accomplishment.

Be realistic about deadlines. If you know you hate yardwork, find someone who can do this for you. Mr. Lucky and I knew we didn’t have skills to do finished carpentry, so we hired the best carpenter we knew. In business, time is money, and selling a home is a business proposition.   

Step 6. Track yourself


One client wanted every door a different color!
If you don’t track results you won’t know if and when you’ve reached your goals. You wouldn’t start a diet without either weighing yourself along the way, or watching how your clothes are fitting you. Small successes build confidence and point the way.

Knowing that you’ve reached a goal lets you know you can move on to another project, or just relax!

Tracking calls for adjusting your goals as you progress. You’ll need to be flexible. Consider alternatives if your top choices seem impossible or impractical.

Are you able to rent your home and still move? Would it be smarter to remodel your home and remain in it? Are you able to owner-finance your home to a buyer who doesn’t qualify for a conventional loan? If you are serious about selling your home, make more than a new year’s resolution about it. Set it as a goal, and start walking towards it!

Happy New Year! May all your goals be reached.

Santa Told Me He Loves These Sesame Cookies

Monday, December 19, 2011
Christmas cookies are one of the most endearing and enduring symbols of the holidays. Every year I bake dozens to give as gifts and to enjoy with family and friends.

Cookies rival candy as an indulgent snack, but they are more healthful. They are less formal than cake, and more satisfying in a homey way.

Cookies are also a guaranteed way to make friends. There is something magical about a cookie. At this time of year, they can pop up anywhere.

They're passed around at offices, warehouses, factories, schools and club meetings. They decorate mantels, trees, and packages.

Cookies are a symbol of good cheer, hospitality, festivity, and heritage. Every culture has its traditional cookies -- amaretti, madeleine, kringla, pizelle, biscotti. There are crescents, wafers, squares, bars, spirals, tartlets, and drops. 

I hear from Santa that these are one of his favorites. These "Benne Wafers," are a Christmas staple in many southern homes. I have been baking these unique cookies every Christmas for over 20 years. They're crisp, full of flavor, travel well, and keep well. Best of all, they're not complicated to make. 

Sesame Wafers

INGREDIENTS
1 cup sesame seeds
1 cup unsalted butter, at room temperature
2 cups sugar
2 eggs
1 teaspoon vanilla extract
3 ½ cups all-purpose flour
4 teaspoons baking powder
1 teaspoon baking soda
1 teaspoon salt

DIRECTIONS
Have ready a small bowl for the toasted sesame seeds.  Heat a saucepan over medium heat, add seeds, and toast them for about 5 minutes, stirring briskly and constantly.  Immediately transfer to bowl.  The seeds should have popped, but not be smoking.
This year my 4-year old grandson helped
make cookies, wearing the cowboy apron
I made for him.

Beat butter with sugar until smooth and creamy.  Add eggs and vanilla, and combine well.

In a medium mixing bowl, sift together flour, baking powder, baking soda, and salt.  Add to butter mixture, and mix well.  Stir in sesame seeds.

Wrap dough in plastic wrap and refrigerate for at least 1 hour, or as long as a few days.  Dough may also be wrapped in airtight bag and stored in freezer for a few months.

Shape dough into 1/2-inch balls.  Place on lightly buttered baking sheets.  Flatten to 1/8-inch thickness with a floured, flat-bottom glass.

Bake in a 325-degree oven for 10 minutes, or until lightly browned.  Transfer to wire racks to cool.  Makes 6 dozen cookies.
                                                                         

My Favorite 15-Minute Holiday Decorations

Monday, December 12, 2011

When your home is for sale during the holiday season, some festive touches make it more attractive to buyers.

But you don’t want to spend boatloads of money or time decorating. Who has an excess of either at this time of year?

Here are my suggestions for some super fast, super easy, super frugal holiday decorations.

Grab some greenery

Find the prettiest containers you have and fill them with whatever is fresh and green.

Places that sell Christmas trees are usually happy to give you the discarded prunings.

If you have any kind of property around your home, chances are there is shrubbery suitable for bringing indoors.

Some possibilities are the usual evergreen clippings, holly, mountain laurel, ivy, yucca, viburnum, magnolia, and ligustrum.
I painted these crepe myrtle twigs white
and use them as placeholders to fill
flower pots that are empty all winter.


Shop your house and garage and garden shed for containers – baskets, vases, crocks, wastebaskets, ice buckets, and pails of any kind can answer the call.

If their style isn’t in keeping with the season, give them a paper or fabric gift wrap, or a quick coat of paint.

You can get creative with this. If all the trees are bare, branches painted white, gold, or silver are a fine substitute for greenery. 

Glue some sticks together

Give me some sticks and some glue and I will give you a trellis, a basket, a fence, a  star, or a tabletop Christmas tree.

I gravitate towards the shiny stuff at Christmas, and if it doesn’t move, I’m likely to hit it with metallic spray paint. But rustic sticks look charming in their everyday color.

I made the stick star from five straight branches of equal length. You could make a similar one using chopsticks, skewers, or stir sticks. I made the tree from a handful of sticks I cut into graduated pieces glued on a single "tree trunk."
Twig props for home staging can be left simple, or 
made more glam with beads and jewels added.

Once the materials are in hand, fifteen minutes! If you want to spend more time, you can get fancy and decorate these stick sculptures with small ornaments, or make a bunch of them to cluster or scatter about. If your style is shabby chic or farmhouse, a twiggy star is a natural for your holiday decor. 

Under my stick star on the fireplace breast, I placed a string of blue lights on the mantel, and softened the look with a length of blue tulle.

Besides sticks, there are plenty of sources for frugal finishing touches in nature. Items from outdoors look marvelous indoors during holiday time. I’m thinking of hydrangeas, holly berries, nuts, acorns, pinecones, moss, wax myrtle berries, and nandina berries. Don’t forget green apples,  lemons, limes and kumquats.

Wrap up a garland wreath

A wreath that looks good on both sides, like this one,
 is perfect to mount on a mirror, window, or glass door.

Start with almost any kind of wreath form. It could be straw, foam, vines, wire, or plywood.

Step one: Attach a wire loop around it for hanging.

Step two: wrap with a glitzy, tinsel garland from the dollar store.

Step three: add a bow on top or bottom, or a ribbon wrapped around as I did, and you are done.

I used a plastic suction cup to hang this garland wreath on the pane of a French door. If you have a metal front door, look for a magnetic hook to hang a wreath on it.

There are other alternatives, including the old fishing-line-thumbtacked-to-the-top-edge-of-the-door trick. Or, buy a decorative metal hook that fits over your door's top edge.

Cluster a group of ornaments

Silver spray paint turned this old twig basket
into something I use every December
.
 

It’s a fast, elegant, and inexpensive decorating trick. Just heap an attractive bowl with simple holiday glass or plastic tree-trimming balls.  

If you don’t have excess ornaments, the dollar store is your friend. Now’s the time to press that glass bowl, tall transparent vases, hurricane chimneys, or wooden trough into service. Pairs of matching see-through vessels are perfect on a mantel or long table.

Having a color scheme helps keep things from being too distracting. Save your heirloom, pricey and delicate ornaments, because some people do get sticky fingers around small objects. Sad but true, thievery is a problem in homes on a home tour.                 

Get the look, get the book

Need more sensible ideas and encouragement for staging your home? Then, download my home staging eBook, DIY Home Staging Tips to Sell Your Home Fast and For Top Dollar. You'll discover how easy it is to make your home the one that people want to come back to for a second visit!

Festive Staging Prop Extrodinaire: How to Make A Christmas Topiary

Monday, December 05, 2011

If you had to choose one prop for home staging that's beautiful, classy, traditional, and colorful, you'd be smart to choose a topiary.

Even if you are staging an otherwise vacant property, a topiary never looks out of place. 

Use one to pretty up a kitchen island, add some color to a bathroom vanity, or decorate a mantel.  

This year I made topiaries from felt circles, folded and pinned onto a foam ball. What I love about this DIY project is that it looks elegant but not formal.

The container has the appearance of antiqued silver, but it's just a throw-away plastic flower pot. The edges of the felt are cut with pinking sheers, which I think adds an evergreen-like texture.

You can change the bow style and use your topiary at other times of the year as well -- pastel polka dots for springtime, multi-colored ribbons for summer, and raffia or burlap for autumn.

By then, you'll be living in your next home, having sold your house that's now on the market!

Container: what you need

  • 4-inch plastic flower pot
  • Stones (or dried beans) to add weight the container
  • Dry floral foam, enough to fill flower pot 
  • Scissors
  • Marking pen that will show on side of container
  • Glue gun and glue sticks
  • Four or more thumbtacks (optional)
  • Metallic silver spray paint
  • Black craft paint
  • 2-inch paint brush
  • Disposable bowl
  • Disposable latex gloves 
  • Rag

Container: how to do

Place stones in bottom of plastic container. Use a common, nursery flower pot that is flexible enough to withstand a thumbtack puncture without shattering. The stones will compensate for the top heavy ball of felt flowers.

Fit pieces of floral foam into container, creating a tight fit that will support the stick that is the stem  of the topiary.

Using the marking pen, draw lines on the sides. You can use a strip of cardboard to guide you if you are not comfortable about drawing freehand.  It doesn’t have to be precise.

Lay the container on its side. Heat the glue gun and trace the lines you made. With the glue gun, draw a swirl or star or an initial in the center of each side.

Practice with the glue gun on a scrap of cardboard if you are unsure of your design, and how much control you have with the gun.

Let the glue on each side harden for a few minutes before continuing on to another side. (Remember not to let the glue gun sit unattended if you have children or pets.) Prop the bottom of the container up with the pen if the pot is tapered so much that the hot glue will run down the side of the pot.
If desired. Punch one or two thumb tacks into the sides of the container. (or nails with large heads). As an alternative, you could make the entire design from thumbtacks.
Spray the container with silver metallic paint. When the silver paint is completely dry, brush the container with a solution of 1 part black craft paint and 1 part water. Make sure black paint gets into every groove and undercut. Using a clean, absorbent rag, wipe most of the black paint off, leaving it in the receded areas for an antiqued look. You will want to wear those disposable latex gloves for this step.
Your finished pot should
look something like this.

The best results come from wiping each side both horizontally and vertically after you have applied paint to the inside rim and all four sides, then dabbing with the rag to remove any streaking. Work quickly, and do not let the paint dry before you can dab it to the look you want.

Topiary: what you need

  • 3-inch round glass or plastic cup
  • 3-inch sphere or square of dry floral foam
  • 2  9- x 12-inch pieces of medium green felt
  • 1  9- x 12-inch piece of chartreuse green felt
  • 1  9- x 12-inch piece of light green felt
  • 1  9- x 12-inch piece of medium green felt
  • 1  9- x 12-inch piece of olive green or blue-green felt
  • Ballpoint pen
  • 72 straight pins
  • Scissors
  • Pinking shears (optional)
  • 18-inch bamboo stick or straight branch, about ½ inch in diameter
  • 4 feet wired ribbon
  • Sheet moss or sphagnum

Topiary: how to do

Using the glass or clear plastic cup, and a ballpoint pen, trace 12 circles on each felt square. If there is a small amount of overlap, the circle can be slightly askew, but the edges should all the curved. I like using the clear container because you're able to see the entire circle as you draw it. Each sphere will take about 72 circles of felt -- more or less.

Using scissors, cut between the circles, so that you have 12 squares. I found cutting the felt into strips of four circles, and then cutting crosswise into individual squares makes the work go quickly.

Using the pinking sheers (or ordinary scissors), cut just inside the lines, so no ink shows on the edges of the circles.
I chose dry floral foam instead of white Styrofoam because it is easier to insert ordinary straight pins without wearing out your fingers. If you prefer Styrofoam, you can use pins with round heads. If using the square of floral foam rather than a sphere, use scissors and shave corners from the square until you have a roughly round sphere, about 3 inches in diameter

Mark the center bottom of the foam sphere with a small hole, where the topiary stem will go. Begin attaching your felt circles at the top, working in circles as you move down the sides of the sphere. I used the lightest greens at the top, but you might prefer a random pattern of mixed greens, or place the light ones in a band around the middle.

Alternate the direction of the individual circles as you go. You can fine tune the arrangement when you’ve got all the folded felt circles pinned on. Check that the hole you’ve made in the center bottom stays at the center of your design. Push the pins firmly into the foam.

Find the center bottom hole and insert the 18-inch stick straight into the bottom of the foam. Insert the other end into the foam in your antiqued silver container. If the stick is unsteady, add some hot glue to keep it centered, checking the position of the stick from all four sides to be sure it is perfectly perpendicular.

Cover the surface of the foam in the container with sphagnum or sheet moss. Tie or glue a bow made from the 4 feet of wired ribbon.

No pinking shears? No problem. You can still make a beautiful felt topiary, like the white one above (perfect for a wedding favor or centerpiece). And if you don't want to decorate with designs or thumbtacks, simple lines, like the ones in the fourth photo above, will still add the look of weight to your humble plastic flower pot.

Get the look, get the book 

Home staging props like topiaries are important elements of home staging. Props like pillows, lamps, books, and plants add the finishing touches to your staged spaces. Search my blog for other DIY projects to create that "Choose-Me look" for your home on the market. Learn more about staging your own home for sale from my ebook, DIY Home Staging Tips to Sell Your Home Fast and For Top Dollar.

Want Some Holiday Scents? Make a Citrus Pomander

Monday, November 28, 2011
You won't believe how easy it is 
to make a fragrant pomander!
Citrus tops the list of fragrances sure to please everyone. So why not greet visitors to your home on the market with the scent of fresh lemons, limes and oranges?

Citrus is a winner

For the holidays I like to mix citrus scents with the spicy aroma of cloves by making pomanders. They're pretty, they're easy to make, and the smell is natural so it won't offend anyone, even the chemically sensitive.

These pomanders are exactly like the ones people used to put in closets and dressers to make things smell pretty in the time before Fabreeze or Lysol.

Originally, pomanders were made and worn to ward off evil spirits and diseases, not to mention body odor in pre-deodorant days. Both men and women wore gold and silver containers as jewelry that held fragrant, stink-masking spices. As much as I love knights of bold in days of old, I'm glad I didn't live in those times.

Now that your home is for sale, I am sure you have cleaned and decluttered, and made it smell fresh. To add a pleasant layer of fragrance, hang a pomander from a ribbon in a closet, set one on a kitchen window sill, leave one on a bedroom nightstand, or just pile some on a plate in the foyer.

Oranges, tangerines, lemons, limes, and clementines 
all make great pomanders.
Once you see how festive and fragrant these citrus pomanders are, you may want to add them to wreaths, cluster them into centerpieces, or attach them on gift-wrapped packages.

Cloves preserve fruit

Remember high school geography stories about European explorers sailing east to discover trade routes to parts of the world where spices grew? They needed exotic ingredients like cloves and cinnamon and pepper to preserve their meats, fruits and vegetables. Your inserted cloves will act as a preservative for your homemade pomanders. Unless you live in a very humid environment, the citrus rind will turn dark and leathery, and the fruit will be naturally preserved.

If your fruits develop any signs of mold as they are drying, move them to a warmer, drier location with good air circulation.

These fruits are a week old, and show signs of drying. 
Eventually, the color will even out.
My version of citrus pomanders is simple. If you like being more elaborate or more precise, it's your call. You can completely cover the fruit, or make intricate designs, or write a person's name or a word like "Noel," or roll the fruit in spices like cinnamon when you're done.

Rather than buy whole cloves in cute little bottles at your supermarket, buy them in bulk for much less money at an ethnic grocer or a natural foods store.

The supplies for this DIY project are ordinary and inexpensive.

Preparations

What you need is
Fresh citrus fruit like lemons, tangerines, limes, kumquats, or oranges
Whole cloves
Skewer, ice pick, or fork
Small towel or rag

Directions

Set yourself up by laying the towel or rag on your work area to provide an absorbent surface. Decide on your pattern, and begin by inserting the skewer, ice pick or fork to make holes. The fork will give you evenly spaced holes, but they will be in a straight line.

Make good sized holes, so that you don't have 
to push hard on the cloves. 

After punching in ten or so holes, insert a clove in each. You can be as choosy as you want, using only those with seeds in the head, or ones without, or both. I use both. If you want to get fussy, you can sort by size, and use all large or all small cloves, or create a graduated design. Arrange them close together, or further apart. You're the artist!

You will find some cloves that are small or broken. 
Discard those, and use the best. 

In a few days your citrus rind will begin to darken slightly, but your pomander will still smell delightful and look attractive. Some people save their pomanders from year to year, because the fragrance never entirely dissipates.

When your house is for sale, and it's holiday time, keeping seasonal decorations to a minimum makes good sense. Scented pomanders are one decoration that is simple and effective, yet inexpensive.

Who doesn't love the fresh scent of lime? 
And the color is perfect for Christmastime.
Discover more tips to help sell your home in my ebook, DIY Home Staging Tips to Sell Your Home Fast and For Top Dollar.


Yes, You Can Learn to Stage Your Home from a Magazine

Monday, November 21, 2011
If you are thinking the rooms in your home can look better to home buyers, but you aren't sure how to do it yourself, there's a fast and fun way to bring your know-how up to speed.

Besides reading my ebooks!

My suggestion is to peruse the pages of Traditional Home Magazine, where the tagline is "Classic Taste,  Modern Life." Look for them on Pinterest. 

Isn't that the same message you want your home to whisper in the ear of buyers?

Are you stuck on how to arrange furniture? Do you stare at your rooms and ponder what tweaks will make them more inviting, more comfortable, more coordinated, more fashionable, more luxurious? Do you wonder what's the best use of bookcases and shelving? Are you looking for an idea for a floral arrangement? Confused about color schemes? Flooring choices? Curtain styles?

I know what you are thinking. "My house doesn't resemble the homes in home decor  magazines, not by a long shot." It doesn't matter. Even if your home is a modest cottage, or an ordinary 1980's ranch house, or an ultra modern condo, or a sparse country lodge, a mobile home, or an old-fashioned farmhouse in the middle of nowhere. The home decor pictured in Traditional Home demonstrates basic principles of good design and interior decoration.

There are lessons to be learned here if you know what to look for.

The first lesson is to wear your staging spectacles. Ask yourself, "What in these photographs makes the rooms look bigger, fresher, friendlier?"  Examples will be color schemes, tabletop and mantel accessories, window treatments, furniture choices, and furniture arrangements.  

The second lesson is to think like a buyer. "What in this photo would be a deal breaker if I were ready to make an offer?" Some examples would be dark wall color, built-in fixtures with too much personality (like an orange Formica countertop, outdated appliances, wallpaper, or landscaping that is very high maintenance).

Traditional Home is just another "shelter" magazine (the best in my opinion). It's not a manual about home staging, but it can still get your eye accustomed to what really good design and decor look like. 

Learn by Example and Copy The Best

Let's look at this one photo to see what we can glean from it.

It's from the October 2009 issue of Traditional Home, and it's the dining room in the home of my absolute favorite designer, Henry Brown.

Here are the elements that I think make this room so drop-dead gorgeous, and suitable for a staged home.

These are all elements easy to imitate.  
  • The colors are soothing. The color scheme is monochromatic, a selection of warm greys and whites.
  • Nothing is tiny or distracting. All the accessories are fabulously over-sized.
  • There are "signs of life" (plants). Henry Brown owns a home and garden store and greenhouse, so his plants are always real, but yours can be silks.
  • A big mirror enlarges the space. There's only one table, one potted plant here. Even if you don't have and can't afford a huge mirror, small mirrors bounce light and confuse the eye about boundaries. 
  • Natural light fills the space. If sunlight doesn't flood your dining area, artificial lighting can make up for it. 
There's Nothing Wrong with Stealing Ideas
Here are more ideas you can bootleg (a word I prefer over "hack").
  • A set of four simple wooden chairs can be painted and upholstered to look comfy and glamorous. 
  • Candlesticks and other accessories don't have to match. Table doesn't have to match chairs.
  • A room divider can let light enter the room, and be made from simple strips of lumber. 
  • Some items look pristine, and other items look weathered and aged. If everything you have is out-of-the-box new, add some props with patina. And if your rooms look too shabby, add items that show off their new-ness. It's a balance.
In this photo of a kitchen from the same issue, we can learn some staging tricks that will work in almost any home.

  • Corbels, feet, and crown moulding added to cabinets can put a custom spin on builder grade cabinets.
  • Dark wood floors and white kitchen cabinetry will never go out of style. 
  • Wicker chairs can be dressed up with small slipcovers to introduce some pattern into the space.
  • A giant bowl of apples and a package of spaghetti make interesting and inexpensive kitchen staging props.
  • A wooden top on a center island turns it into an eating area.
Try it yourself, and see what fresh ideas you walk away with when you spend some relaxing time lost in the pages of Traditional Home. They don't pay me to say this. I have issues dating back to 2000. Does that tell you my drug of choice?

And while you're thinking of how to make yourself a better home stager, check out my eBook, DIY Home Staging Tips to Sell Your Home Fast and For Top Dollar, and see what's in store for you for the price of one issue of Traditional Home.

How to Save Money on Window Treatments

Monday, November 14, 2011
You can make fast and easy curtains for staging.
Got naked windows to dress? Looking for a frugal way to change the curtains in your home?

How you handle window treatments when your home is for sale is crucial.

Window dressings have multiple jobs to perform. They can let in light, but also show off a pretty view or else block an unattractive one.

They will soften the hard edges of a room and they definitely set the style of a room and make a space seem more comfortable.

But dressing them can cost a pretty penny. So, I gathered all my money-saving window ideas in one place.

My $4.99 eBook, No-Sew Curtains and Draperies to Stage Your Home will be your guide when you're deciding how to dress windows.

Maybe you're removing your valuable window treatments because you want to take them with you and not let the buyers "negotiate you out of them."

Or maybe you've already moved and are staging your home minimally, wanting it to look occupied from the outside.

Or perhaps you just don't love your draperies, or you think they don't make your home look its best.

While writing this eBook, I've assumed that you don't have the interest or skills or equipment for sewing. No problem! This book tells you --

Which window treatment styles are the thriftiest

Where to buy fabric, mounting hardware, and other supplies

How to use alternative materials to save money

How to make luscious draperies from blankets that no one would ever suspect are a DIY project

How to choose the right mounting hardware and rings for a million dollar look on a dime

Making curtains from plastic tablecloths (Don't laugh. They're gorgeous!)

Two quick mini-blind makeovers that anyone can do and that pack a wallop of style

New tricks using bedsheets for draperies and curtains that give any space an upscale look

Tips for imitating the latest window treatment styles so your home looks up-to-date

How windows in the staged home should look, and how to get that look on a shoestring

All the super-simple alternative methods to sewing. There's more than one or two!

No-sew shortcuts to hemming that I've learned over the 50-plus years I've been sewing.

You don't want to miss this book, even if you are not planning to sell your home but want some new window treatments that don't require sewing. Go here to order and download now.   

How to Make Your Closets Look Larger

Monday, November 07, 2011
The great thing about a closet is that you can shut the door (or at least you should be able to!) because people don't go peeking into closets when they stop by to borrow some butter.

But, when you're selling your house, all bets are off.

You know that prospective buyers touring your home will open all your closets to see how big they are.

They want to know if their stuff will fit.

Closet and cabinet space can make or break a deal for house hunters, so my challenge to you is to clear some closet space to make them every home owner's dream: spacious and organized.

No matter which closet is your biggest obstacle, I have a few easy solutions that could just leave you wondering what to do with all of your extra closet space.

Answer: leave it clear for your buyers' imaginations!

Here are the common closet problems and solutions for each.

If your linen closet is overflowing

Store one extra set of bed sheets in each bedroom.

Fold clean towels neatly on a shelf in your laundry room.

Put the extra blankets to use by draping one neatly across the foot of your bed.

Reduce the number of sheets and towels you store by getting rid of ones you don't use or love.

Store quilts and flannel sheets in plastic bins under a bed during the warm months.
Reducing clutter, and keeping things organized
and hidden make closets look bigger.
Photo: Shades of Blue Interior 

If you lack space for cleaning supplies

Keep a small cleaning caddy under a bathroom sink.

Place every item in the room it is intended for: extra laundry detergent in the laundry room, dish soap under the sink, garbage bags in the bottom of the trash can.

Create a small space for a broom and dustpan combo next to your washer or dryer.

Look for hidden places where you can hang brooms, mops, dusters, and other tools. Inside a closet, on either side of the door opening is always a place that's out of sight unless it's a walk-in closet.

If your coat closet is jammed

Hang a row of hooks in your entry to catch backpacks and purses.

Pare down the coat selection to two coats per person, and either part with the rest, or put them in a space-saving bag, out of sight until the move is over.

Keep hats, scarves, and other small items in a box on the shelf.

If your pantry is out of control

Stop buying in bulk. Unless you have an abundant and well-organized basement or garage storage, it might be worthwhile to put your bulk wholesale membership on temporary hold. Nothing shrinks a cupboard like an over-sized supply of food and paper goods.

Empty prepackaged snacks out of their boxes, and use a matching plastic or glass containers to organize the snacks.

Double your shelf space with a few risers to stack things like cans or spices.

Toss out-of-date packaged foods, old spices, and nonperishable foods you bought years ago and have not used.

    If your bedroom closets leave something to be desired

    Store folded clothing in baskets or boxes that match, preferably light-colored containers, the way the baskets and bins look in this photo from A Bowl Full of Lemons via Good Housekeeping. 

    Invest in slim hangers that match.  

    Get into the habit of rotating your clothes seasonally so that half of your clothing is out of sight at all times.

    Add additional, compact storage, such as a free-standing drawer unit, a small bookcase for shoes, or a double-hung closet rod.

    Hang a mirror. Even a small one makes a space feel larger.

    If you own a "junk closet”

    Inventory the contents and define a purpose for the space. Then, find homes for random items that do not fit with the purpose.

    Prepare yourself to part with infrequently used items. It's not called a "junk closet" because it's filled with your most beloved belongings, is it?

    Hide odds and ends in pretty storage boxes like matching canvas-covered boxes and a set of coordinated hatboxes. There are plenty of choices at discount and dollar stores. These containers will unify the space rather than draw attention to its hodgepodge contents.
      Once the contents are under control, each and every closet is automatically going to seem larger. You can proudly leave your closet doors open and let the compliments roll in!

      You'll find plenty of other tips for staging your own home in my eBooks. You can download now and start planning your home staging immediately.

      Top Photo: Real Simple


      Faking a Bedroom- Part 2: DIY Bedskirt

      Thursday, November 03, 2011

      On Monday I showed you how to make a low-cost headboard to stage a bedroom.

      Because bedrooms are important to buyers, they need to look irresistible!

      Today's tutorial shows you how to make a beautiful bedskirt to disguise the inflatable mattress we used to stage an empty space as a bedroom.

      Start with a fabric that is not difficult to match when constructing the bedskirt. Plaids, wide stripes, and one-way designs are difficult to match. A solid color, a small geometric, pinstripes, or a design that looks random, works best. Make sure the fabric is opaque enough so the inflatable does not show through.

      This bedskirt has box pleats at the corners. It gives the bed a tidy, tailored look, isn’t too girly, but adds a small amount of fullness. You can put one more box pleat midway on each side of the bed for a more custom look. If you decide to add side-pleats, you’ll need to add another half yard of fabric.

      What you need  

       Inflatable bed
       3 ½ yards of fabric
       Iron and ironing board
       Scissors
       Yardstick
       Masking tape
       Duct tape

      How to do

      Make sure the inflatable is completely blown up and that the valve is secure, because if the bed deflates, the bedskirt will not be the correct length. Set the bed on four milk crates, as shown in the headboard tutorial.

      Fold the fabric in half lengthwise. Be precise.


      Iron the lengthwise fold. This crease will give you a line to cut on to divide the fabric into two lengths.


      Cut the fabric in half, along the fold.


      Turn over a 1-inch hem along the cut edge of both pieces of fabric. Pin the hem as shown. If you chose a one-way design, use the selvage (the woven edge) to be the hem on one of your two cut pieces of fabric. Otherwise, the design on one side of the bed will run upside down.


      Iron the hem. Iron right up to the pins, but not over them, so that you have the entire edge pressed without leaving marks where the pins are. You are going to use masking tape to hold the hem in place, and you won’t be able to iron over the masking tape, so make sure all wrinkles and creases are out.


      Use masking tape to finish the hem. Leave the pins in place until you have the entire hem taped. We're making a temporary bedskirt in this tutorial. If you want to sew the hem, or use fabric glue or fusible tape, knock yourself out.


      Find the center of the inflatable’s bottom edge (the “foot of the bed”). Mark the center spot with a small piece of masking tape. Fold three or four inches back, and tape the folded end of one fabric length to this mark.  Make sure the hem sits just above the floor. Finger press the fold for a crisp look.


      Tape the opposite end of the same length of fabric just around the corner at the head of the bed, checking to be sure the hem sits just above the floor.


      Tape the fabric length at the center of the bed’s side, and at the front corner in two places. Let the excess fabric fall as shown.


      Bring the center of the loose fabric to the corner of the inflatable bed, and tape it to the bed.


      Create a box pleat at the corner by folding the two side pieces to meet at the corner, as shown, and tape in place. Finger press the folds.


      Repeat this process on the other side of the bed, starting at the foot of the bed. Slide the end of the second length of fabric under the fold of the first length of fabric. Then fold the second length of fabric to create a box pleat. Tape in place. Don’t worry if one fold on one side is deeper than the other, as long as they look okay from the front. Finger press the fold.


      To make the temporary bedskirt stay reliably in place, tape the top edge to the inflatable using duct tape. I used white duct tape because that's what I had, but ordinary duct tape is fine.


      Cover your bed with a blanket, bedspread, or duvet that covers the taped edges on the inflatable, and that is thick enough to hide the indented pattern on the top of the inflatable.


      Once an empty bedroom is staged with a headboard and a beautifully made bed, you’re on your way to creating that luxurious bedroom buyers respond to.

      Get the look, get the book

      Did you know that I've written an ebook -- not a pamphlet, but an illustrated 150-page pdf -- all about staging your own home for the real estate market?

      You can download it now, and begin making your home the one that stands out from the competition. Staging sells homes.

      Whether you did it deliberately or not, your home is already staged. Make it staged to sell, by following the easy advice in my home staging ebook, DIY Home Staging Tips to Sell Your Home Fast and For Top Dollar.  


      Popular Posts