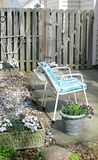
So, what's up with these razzle-dazzle, downright gaudy cushions I'm suggesting you make to stage your outdoor seating area?
The fact is the rules change as soon as you step outdoors. Highly saturated colors can hold their own under intense sunlight. Also, fabrics manufactured to be used out-of-doors always seem to feature bold designs and colors. Whether you choose awning stripes, solid colors, tropical prints or even florals, they're mostly big, stylized, and loud. Fun colors and wild patterns seem more ... well, fun.
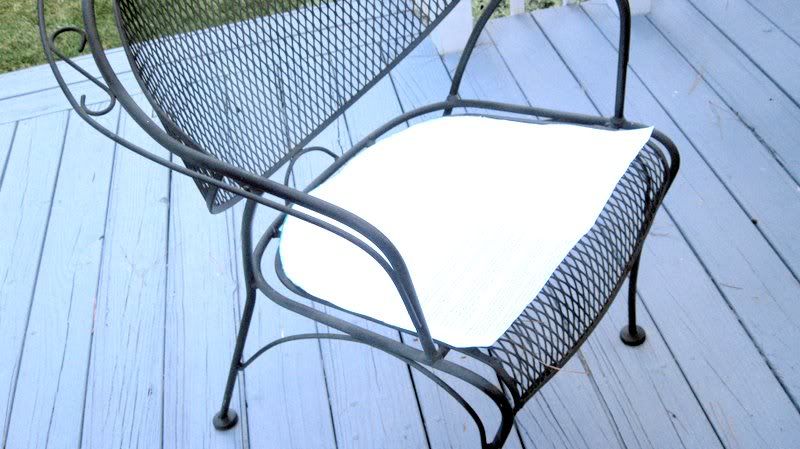
If you want to give this project a go, the first step is to make a paper pattern for the cushion so it will fit the chair.
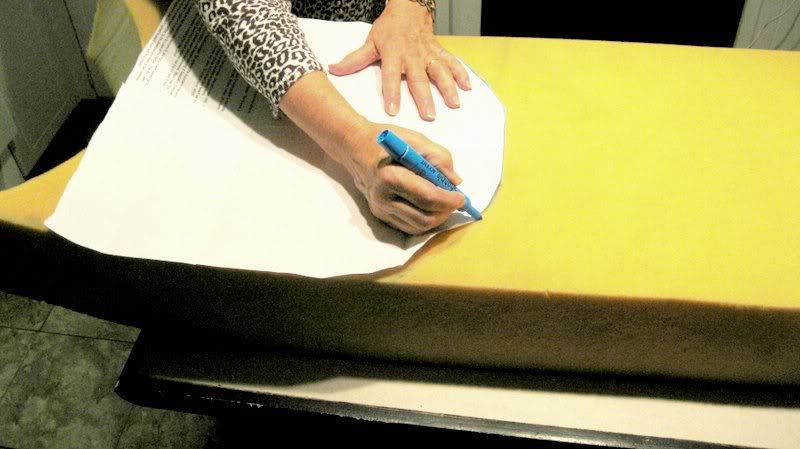
Next, draw the outline of the pattern onto the foam.

Using an electric knife or serrated bread knife, cut out the cushion.
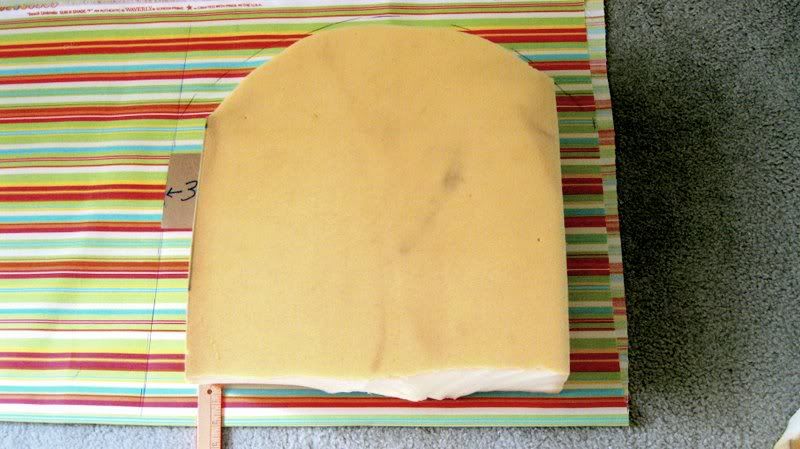
Lay the foam or the paper pattern on the fabric, and mark the cutting edge. I marked 3 inches out from the sides for a 4-inch think cushion (to allow for a 1-inch side seam). I set the front edge of the cushion 2 inches in from the fold, to accommodate the 4-inch thickness.

Cut the fabric on the line. You might want to make one cushion at a time to double-check your measurements.
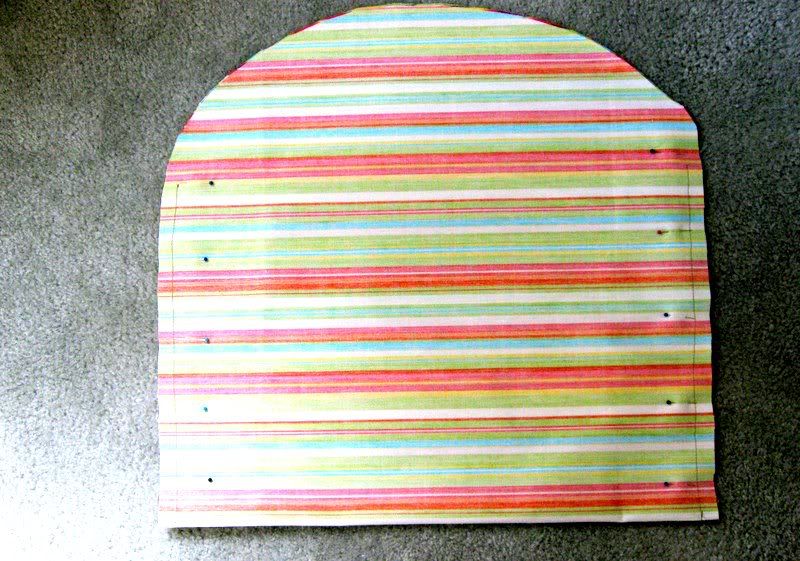
With rights sides together, pin the two sides edges, stopping where the edges begins to curve. Sew both side sides of the cushion cover, beginning at the front fold, and continuing to where the edge curves.

Open the front fold out flat, so the seam is in the center of a triangle that measures 4 inches across. Draw a line where you will sew to make a mitered corner.
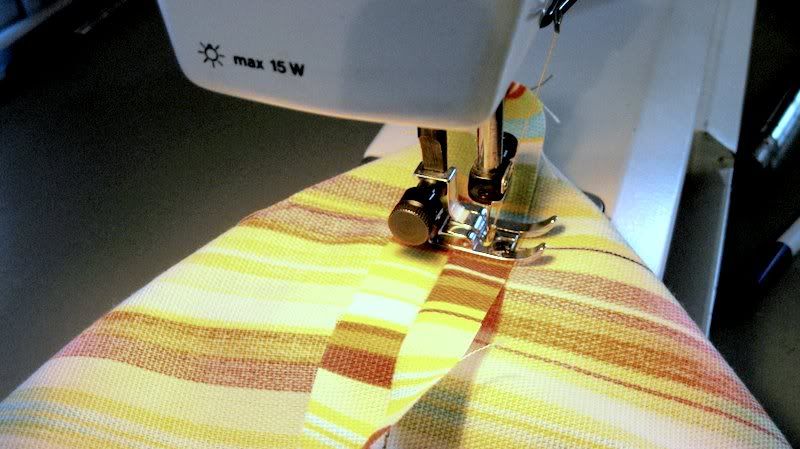
Sew across the flattened seam where you drew the 4-inch line.
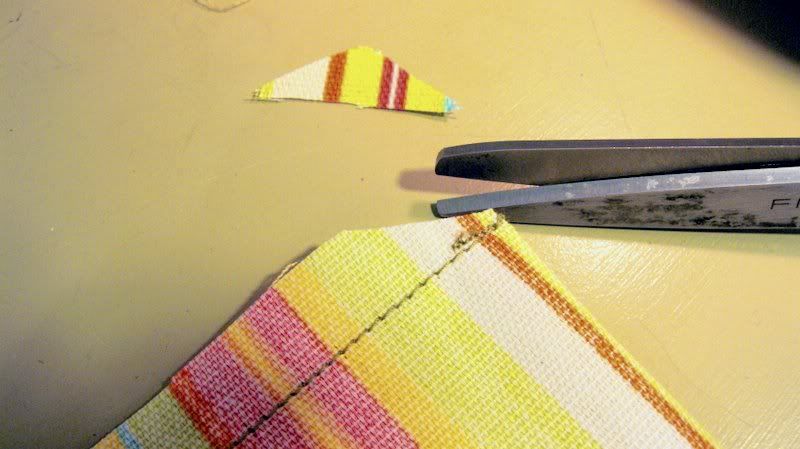
Clip the corner so the seam will lie flat when you flatten it and sew across it.
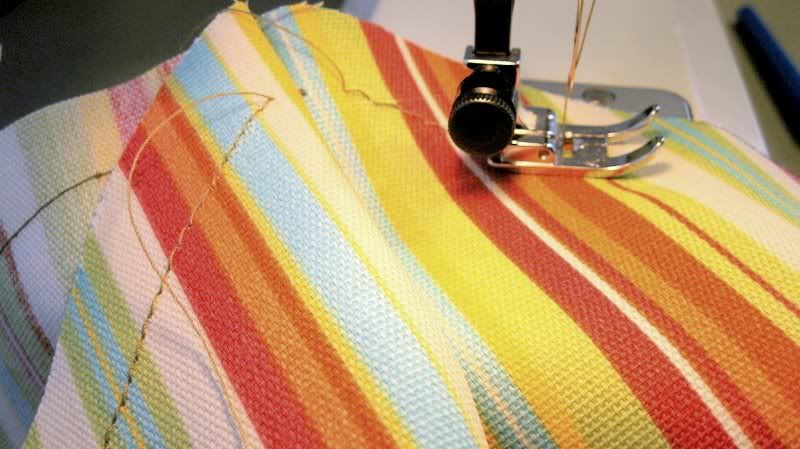
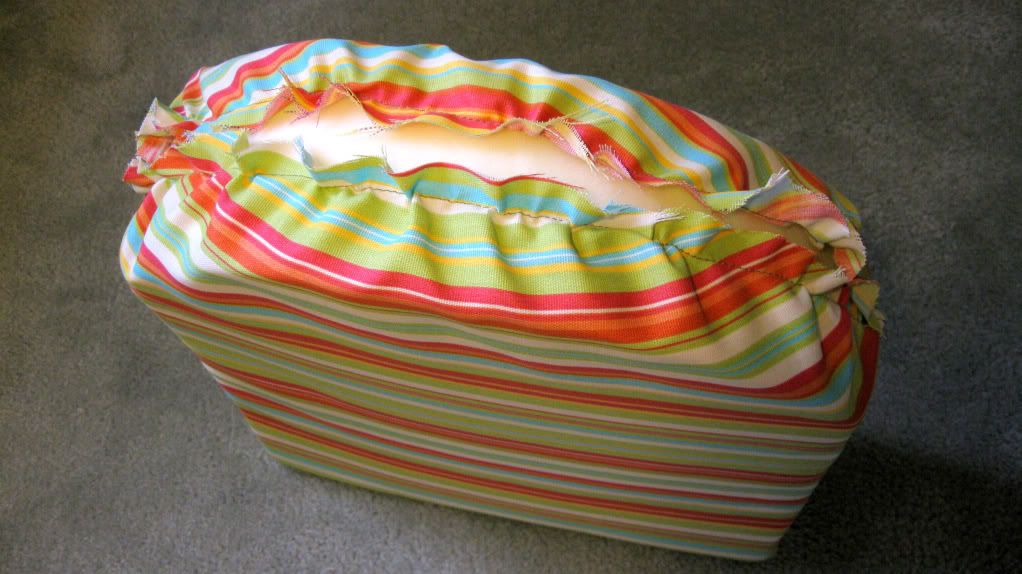
Sew a line of large basting stitches 1 inch from the raw curved edges on both top and bottom, beginning and ending where the side seams end. These stitches will help gather the fabric to ease around the back curve.
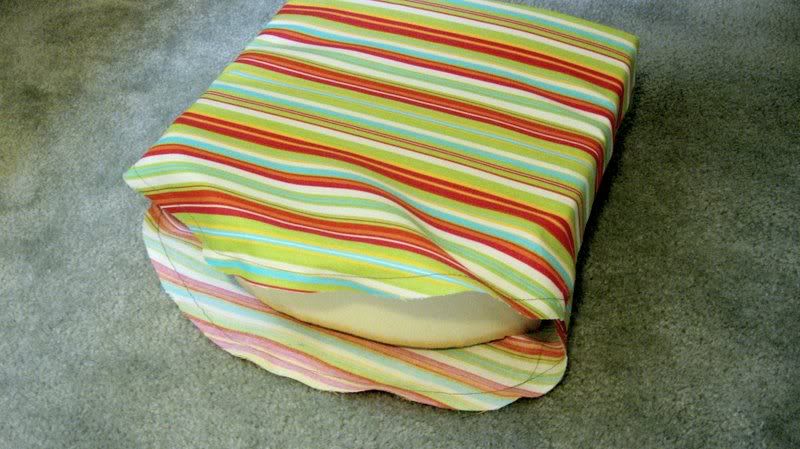
Turn the cushion cover right side out, and slide the foam into it.
Pull the bobbin thread on each line of basting stitches, gathering the fabric to fit the curve of the cushion.
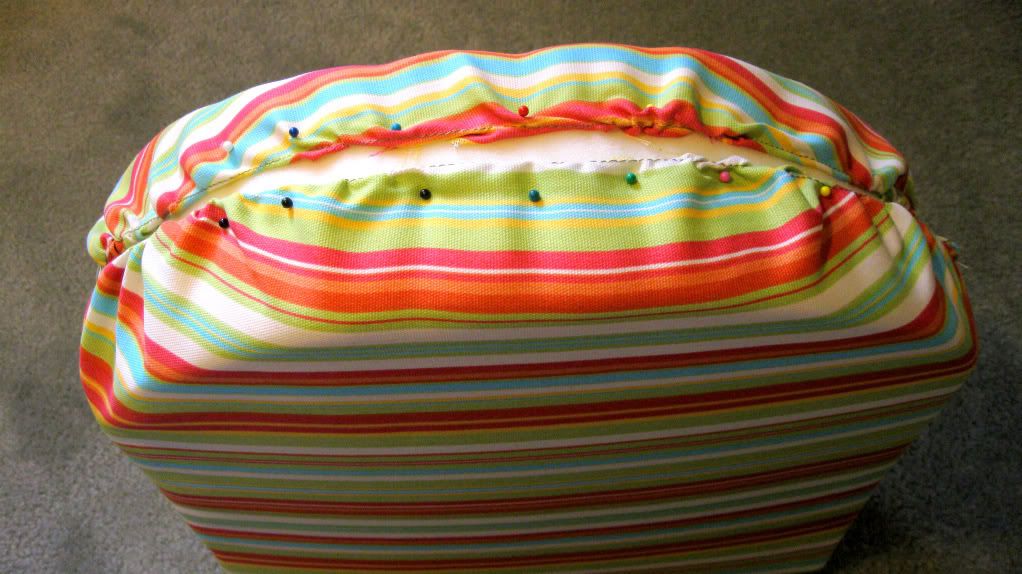
Fold the fabric under at the lines of stitching, and stick straight pins into the fabric and foam to arrange the gathers evenly across the back of the cushion.
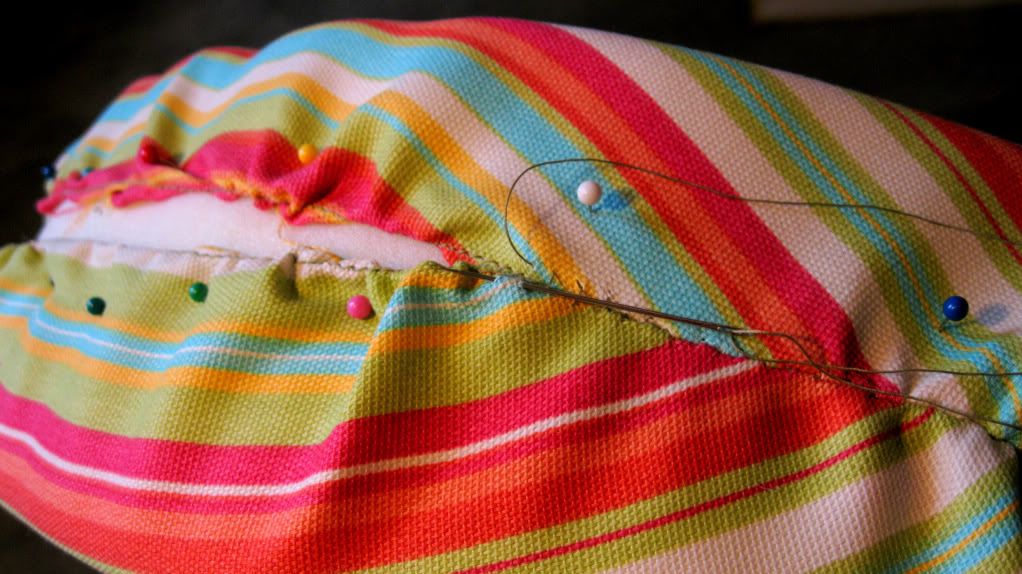
Stitch both gathered edges together, using a blind stitch that goes from side to side, a slipstitch, or overcast.
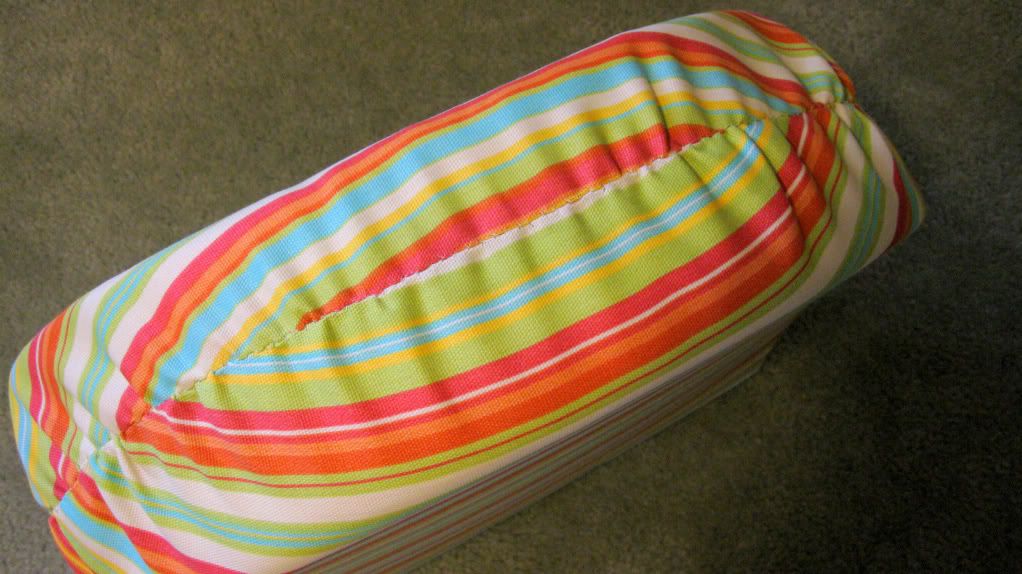
Your finished back seam should look like this. Your cushion is done. If you are making square cushions, all four corners will get the mitered treatment that this cushion has in the front, and you won't have to hassle with curves and gathering.
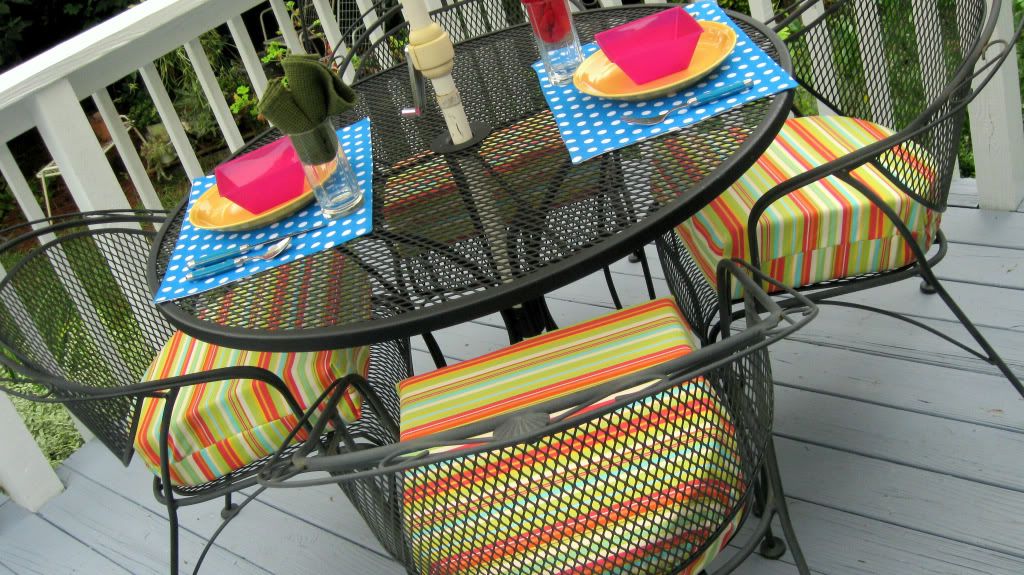
My new cushions really jazzed up our deck chairs, and made them much more comfortable. Some attention-getting colors in your outside living areas can help buyers see the beauty of your yard, deck, patio, or porch. I hope you'll decide to make cushions to help stage your home on the market!
I show you more ways to maximize your outdoor spaces in my eBook, DIY Home Staging Tips to Sell Your Home Fast and for Top Dollar. You can download the book NOW and start staging today.

I show you more ways to maximize your outdoor spaces in my eBook, DIY Home Staging Tips to Sell Your Home Fast and for Top Dollar. You can download the book NOW and start staging today.