If you're sprucing up your curb appeal to help sell your home, a wreath on the front door is essential.
Whether your home on the market is an apartment in a condo building, or a farmhouse on 100 acres, your front door is one sight that buyers will surely notice.
Usually, they are standing there, waiting while the realtor fumbles with the key or lockbox.
They are standing there studying your front door. Is there something visual to delight their eye, and impress them even before they step inside? If not, you've missed a chance to capture their interest.
Wreaths rule
A wreath on the door is the simplest exterior decor item going. Anyone can DIY one. Everything you need you probably already own. Simple or intricate, artsy or traditional, subdued or colorful -- it's your call and it all depends on the style of your home and the message you want buyers to get.
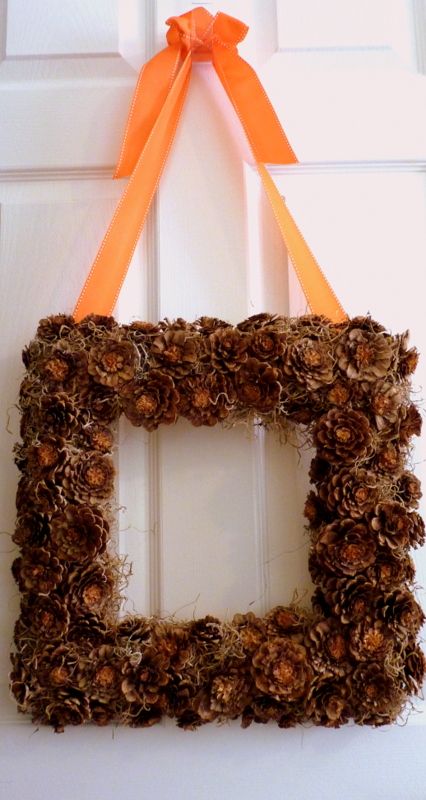
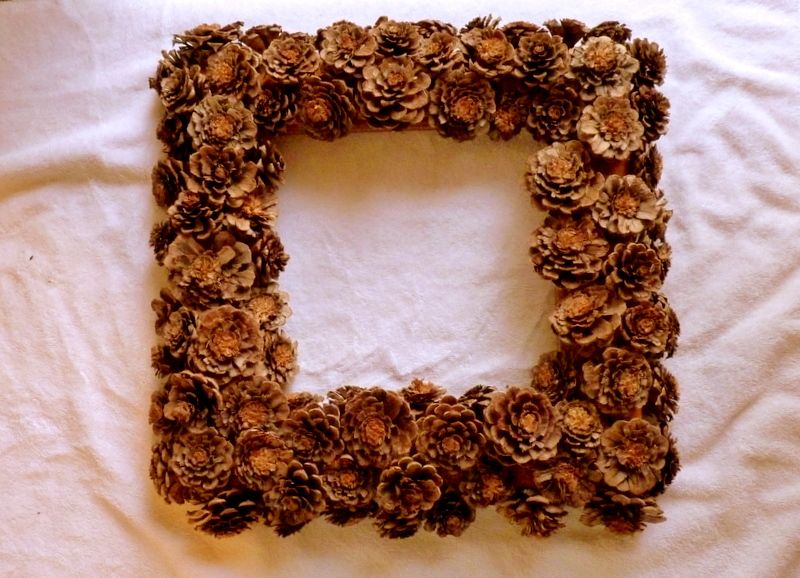
I love the look of a square wreath. It's just different enough to be interesting. I made this pine cone wreath as an autumn decoration, but it will stay up through the holidays if this home hasn't sold by then! I'll change the bow to red satin, and wire in a few shiny ornaments.
You can consider a pine cone wreath your default wreath. It can be stored away, then brought out and refurbished for almost any season. Leave it plain, or paint it. Cover it with seasonal picks or hot glue on the silk flowers. Tuck in the seashells, nuts, buttons, or dried seed pods. Wrap it with garlands or tie on your bows and ribbons!
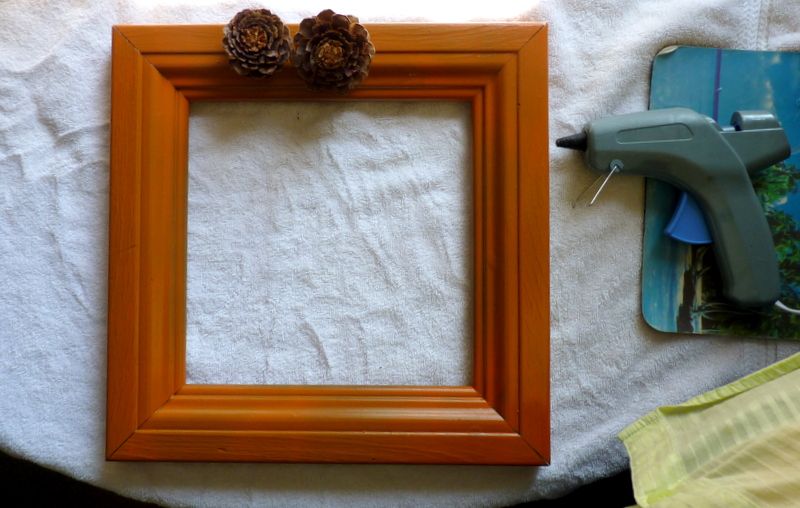
Here's how to make a basic pine cone wreath for pennies, using a plain picture frame as a base. You'll also need some tin snips or pruning shears, a pair of garden gloves to protect your hands, a hot glue gun and some glue sticks, and a ribbon or other embellishment for a finishing touch.
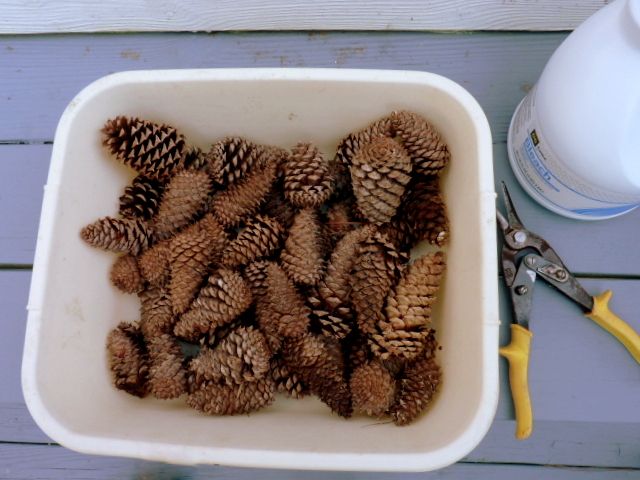
Gather your materials. I live in where pine trees grow, so scooping them up is just part of routine yard maintenance. You can buy pine cones if Mother Nature doesn't hand them to you. You will need something to cut the tops off the cones. I use tin snips because they are strong and sharp. I've also used landscaping loppers and hand pruners.
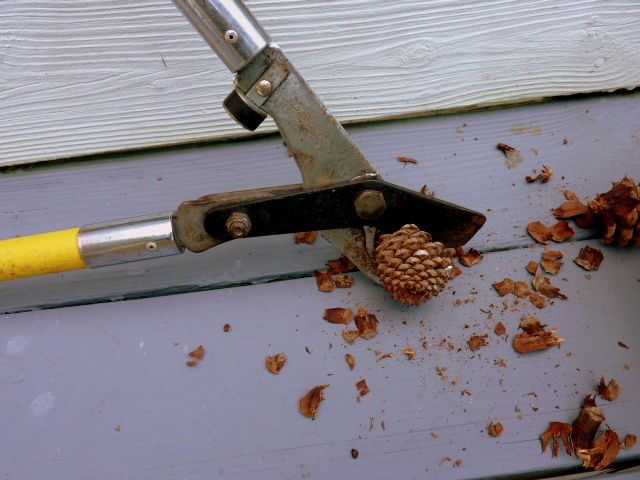
This is what the loppers look like. They open wider and provide more leverage than hand pruners. Use them to cut the bottom few inches off all your pine cones. The cuts don't need to be precise or especially neat. Your wreath will have a natural rather than refined look, so irregularities are fine.
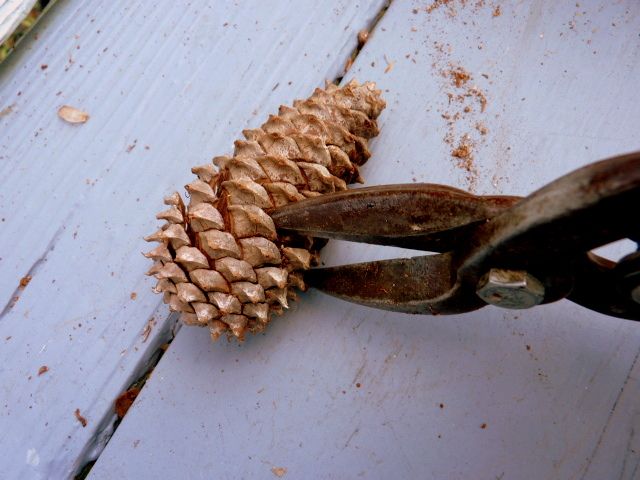
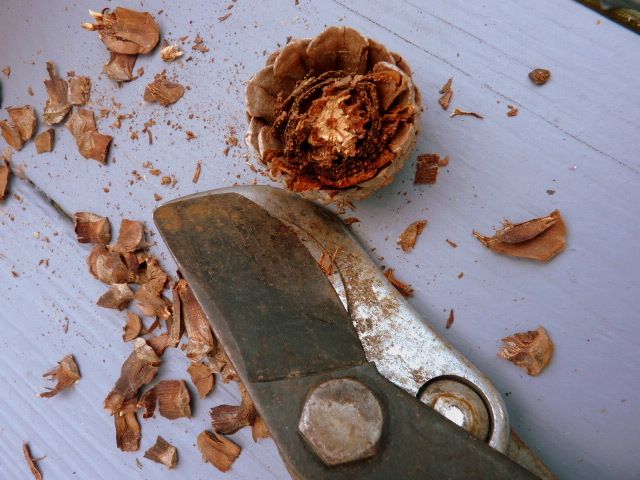
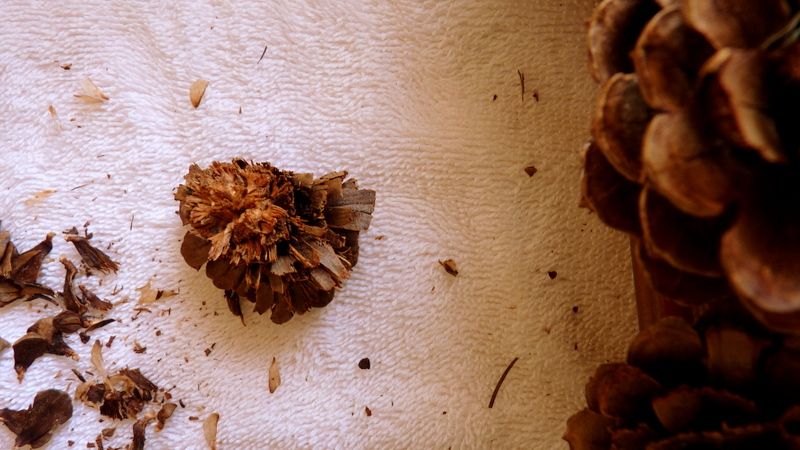
This is what the tin snips look like cutting the bottom off a pine cone. This bottom section will be the "flowers" that form your wreath. Making the complete cut may require that you rotate the pine cone and snip into the center from three or four sides of the pine cone. Work on a serious work surface, so you can brace the tin snips against the surface for good leverage when cutting. Usually, you can cut a second "flower" from the top portion by snipping the tip off the top of the cone.
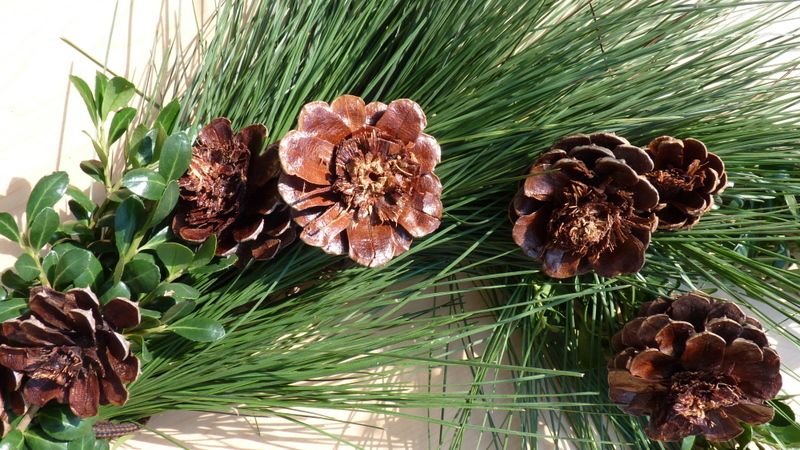
Whether it's the bottom or the top of the pine cone, it will look like this when you've made your cut. It doesn't look all that attractive yet, because the cones I collected were fairly fresh and damp. Once the cones are dry, they open to look more like flowers.
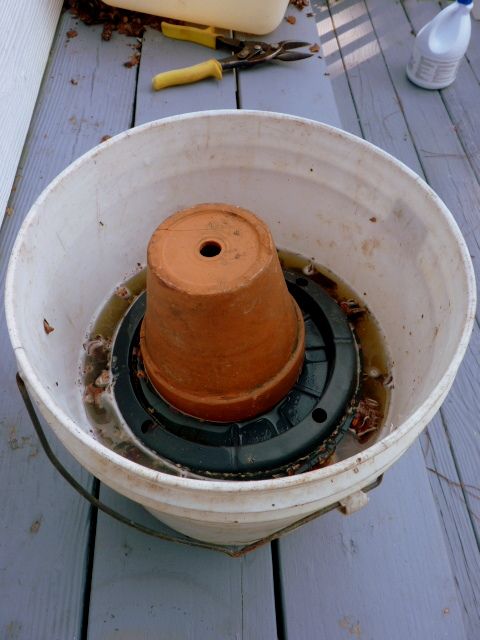
I wanted to make my pine cones a lighter color, so I soaked them in a solution of one part water and four parts bleach. Since the cones tend to float, I weighted them down with a piece of stiff plastic and a flower pot. They soaked overnight. In the morning, I rinsed them well in fresh water, and let them drain.
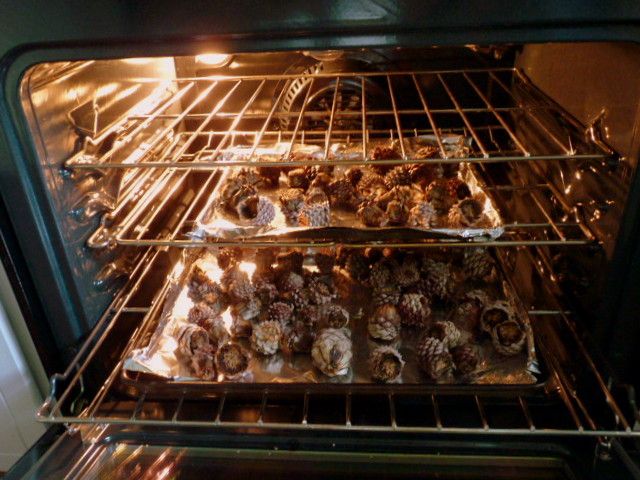
I covered two baking sheets with aluminum foil, arranged the pine cones on the foil, and set them in a 300-degree oven for two hours. The foil protects the baking sheets from getting drips of pine sap. It took that long to get them totally dry, so that they opened up. Bleaching and drying your pine cones is optional, especially if you plan to spray paint your wreath after it's assembled.
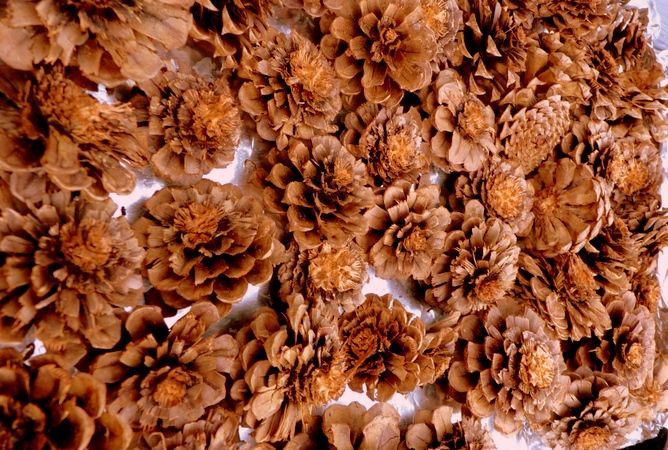
Now, we're getting somewhere. You can paint the pine cones or leave them natural. Or, do a little of both, like leave them natural, but add some glitter to the edges, or some beads to their centers.
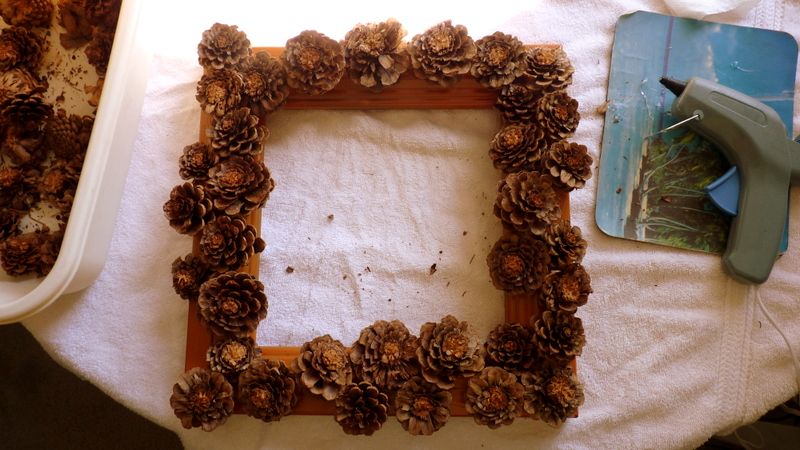
Start making your wreath by hot gluing a line of pine cones across the front of a picture frame. Place a good amount of glue on the bottom tip of the pinecone, press it to the frame, and hold it in place until set. I chose a nice wide frame and painted it a burnt orange color. Most of the frame won't show, so it could be any background color, like black or brown. Don't worry if pieces of pine cones fall off as you glue. It will look fine when you finish.
Fill in most of the front of the frame. There will be spaces between the large pine cones. Work in different areas of the frame, so the glue can be setting up while you glue pine cones to the other sides.
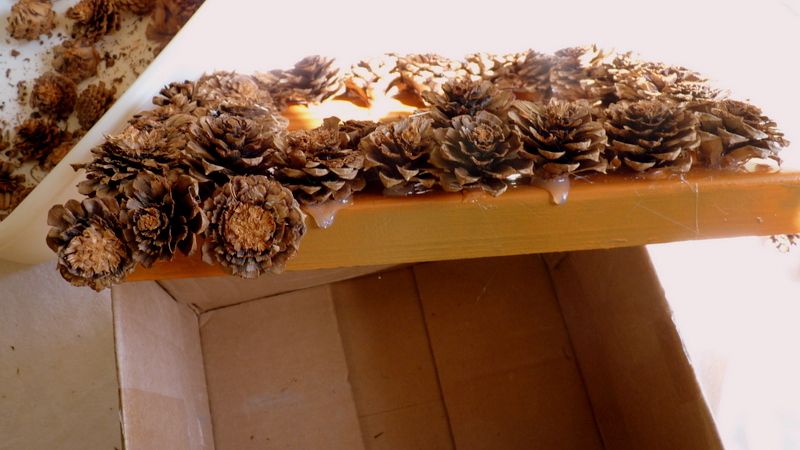
Set the frame on edge to glue pinecones to the edges. I lean it against a cardboard box so the pine cones stay in place by gravity until the glue sets up. If your frame is not as thick as this one, covering the sides of it may not be necessary. You may choose to glue one side, then walk away while the glue cools and sets. If you do this, remember to keep children and pets away from the hot glue work area.
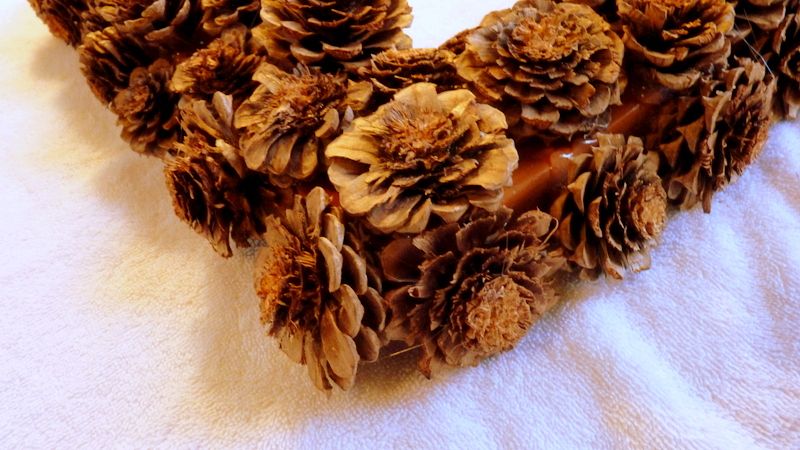
While gluing the pine cones to the sides of the frame, start at the corners, and glue them so the square shape of the frame is maintained. If you want a square wreath, you don't want rounded corners!
.

To fill in the gaps on the front and the sides, use smaller pine cones or pine cones that have been broken in half. Sometimes you just need to break some of the petals off the pine cone to get it to fit into spaces on the frame. As an alternative you fill these spaces with natural objects, found objects or crafted objects. I have used small hemlock cones, shells, acorns, nuts, beads or marbles.
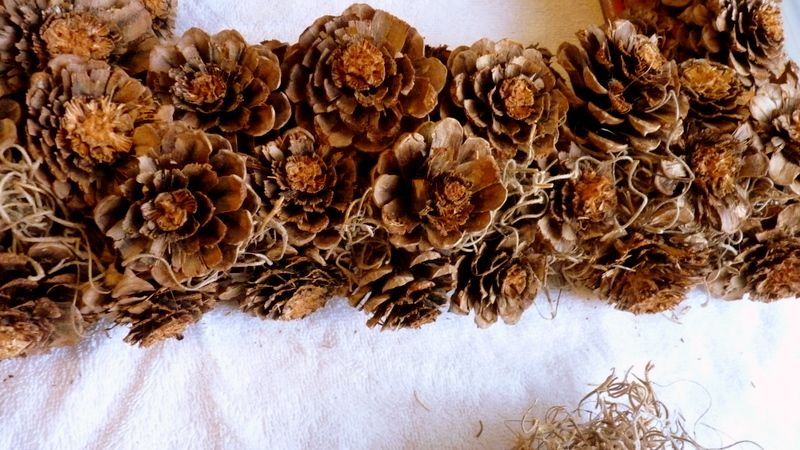
This is how my wreath looked when I had used up all my pine cones. There were still some small spaces between the pine cones here and there. I wanted to keep the look simple and natural, so I chose to fill the gaps with sphagnum moss.
I tucked tufts of sphagnum moss between the pine cones to conceal the painted frame that was still visible. Filling in all the spaces gave my wreath a full, lush look. I knew this kind of look would provide a versatile base for other seasons besides autumn.
 |
The neutral colors of a wreath made from natural materials are
always pleasing and will compliment almost any outdoor decor. |
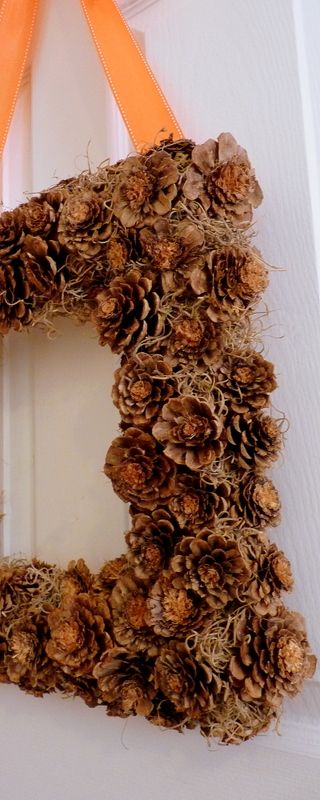
I added a length of orange grosgrain ribbon, hot glued onto the back of the frame. I can cut this ribbon completely off to dress this wreath for other seasons of the year. Hanging any wreath is easy with a handy-dandy $1 clear plastic wreath hanger, but you may prefer a dressy metal one. I like the wreath hanger to disappear, but that's just me.
 |
Once you learn how easy it is to make pine cone flowers, you'll want to add them to any
Christmas wreaths and swags you make. I sprayed these pine cones with a coat of clear gloss. |
 |
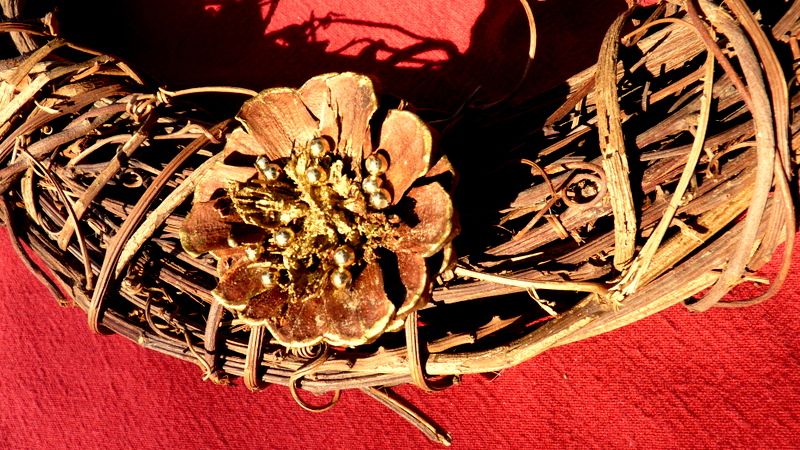
I used a brush and gold paint to add some glimmer to the edges and the center
of this pine cone flower. Then I glued some gold beads to the center. |
 |
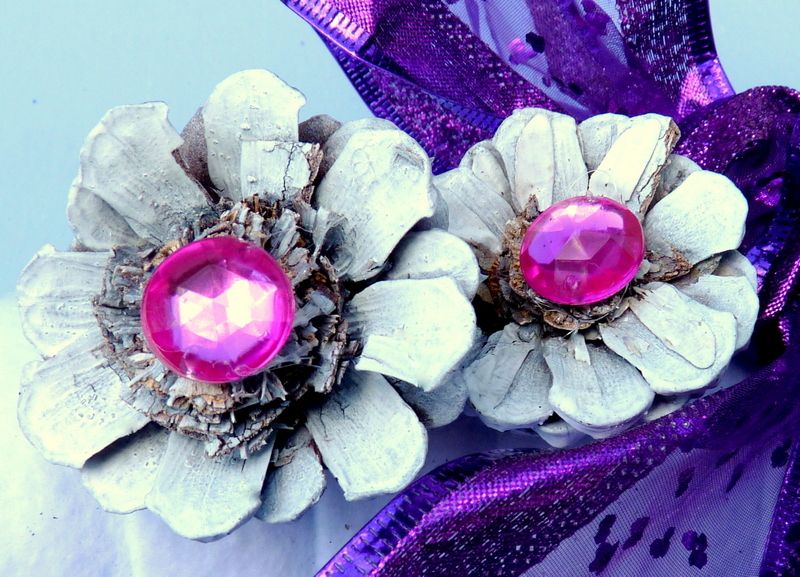
You can get as fancy as you want with pine cone flowers. These got a coat of white
spray paint and some pink "jewels" before being glued to a white felt wreath. |
A wreath may be all that you have to do to get your home on the market ready for fall.
If you are getting ready to sell your home, or if your home is already for sale, my
eBook, DIY Home Staging Tips to Sell Your Home Fast and For Top Dollar will help you. Don't go it alone when I can take your hand, and lead you through the maze of trends, tricks, and tips professional home stagers use.