
 |
| These custom framed botanical prints look classy, but are economical and easy to make. |
She told me that if she enters a Michaels store, the security alarms go off because she doesn’t have a crafty bone in her body.
Do you feel that way when you see craft projects on blogs and in magazines?
Would you like to produce some simple but professional-looking art for your home on the market?
Maybe you’ve decluttered and cleaned your home and then discovered you’ve stripped away too much personality!
Or maybe you've removed all your family photos and now have bare walls staring back at you.
Well, that’s the time to summon framed artwork to the rescue. Follow this tutorial, and you'll have some artistic finishing touches for your staged rooms.
Art's value
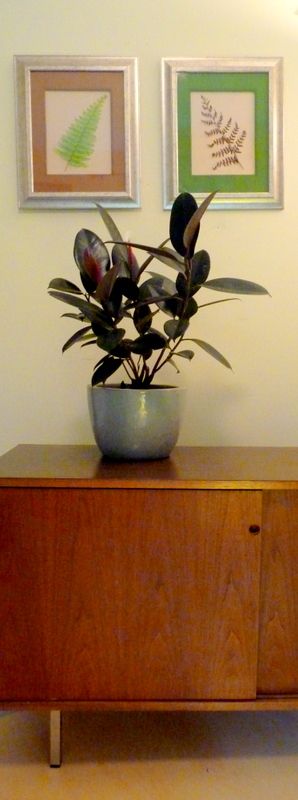
Nothing adds character and charm to a room like artwork on the walls. Here’s my step-by-step for making a set of pressed botanicals framed with custom mats.
The key to making any art look impressive is in the matting and framing.
Even a child’s squiggle or a vintage postcard looks smashing when it has some space (the mat) and a border (the frame) around it. So, there’s no need to dig deep into your budget to decorate even large walls in your home with original art. Artsy, frame-worthy stuff is all around!
Even a child’s squiggle or a vintage postcard looks smashing when it has some space (the mat) and a border (the frame) around it. So, there’s no need to dig deep into your budget to decorate even large walls in your home with original art. Artsy, frame-worthy stuff is all around!
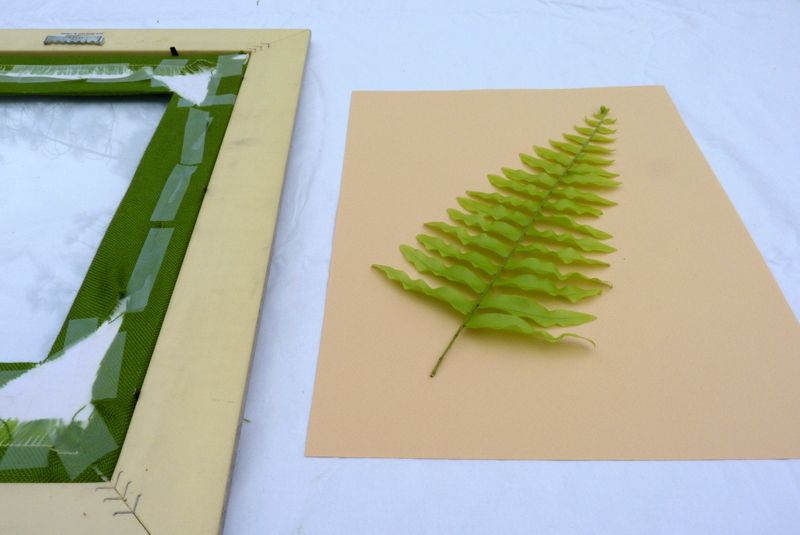
In this tutorial, I’ve used dollar store frames that came with cardboard mats, and recovered the mats with scrap fabric to complement the two kinds of ferns I picked.


Please note that these pressed specimens are not of archival quality. They may turn brown with time because I did not dry them in silica gel or press them for a year under encyclopedia books, but they will look just fine until your home sells!
What You Need
- Some specimens of greenery or flowers
- Paper towels and large books for pressing the greenery
- Something heavy to weight the books while pressing
- Lint-free glass-cleaning cloth
- Frame with mat and glass
- Sheet of plain paper, larger than mat opening, preferably a stiff paper like watercolor or pastel paper, but budget construction paper will work as well
- Scissors, sharp ones
- Screwdriver, flathead
- Fabric, larger than mat, and in a color or design that coordinates with the room where the art will hang, and that compliments the artwork itself
- Tape, either transparent or masking
- Rubber cement
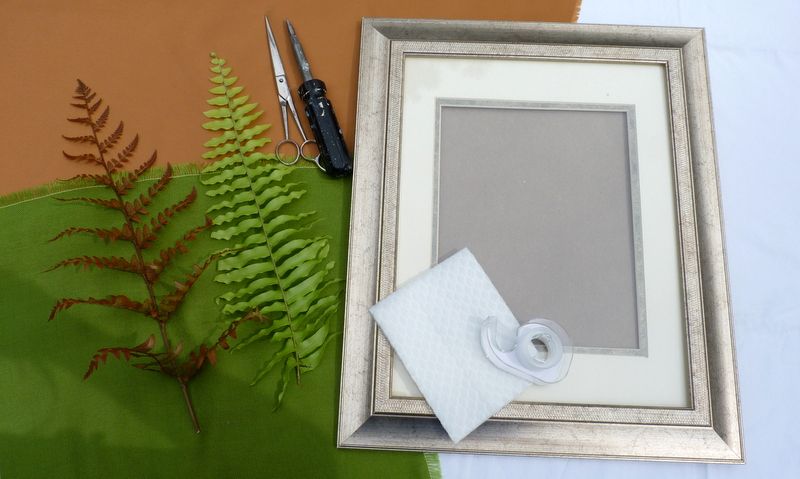 |
| I chose some green fabric and some brown fabric that picked up the colors of the two ferns I planned to frame in two separate frames. You could use a pattered fabric as well. |
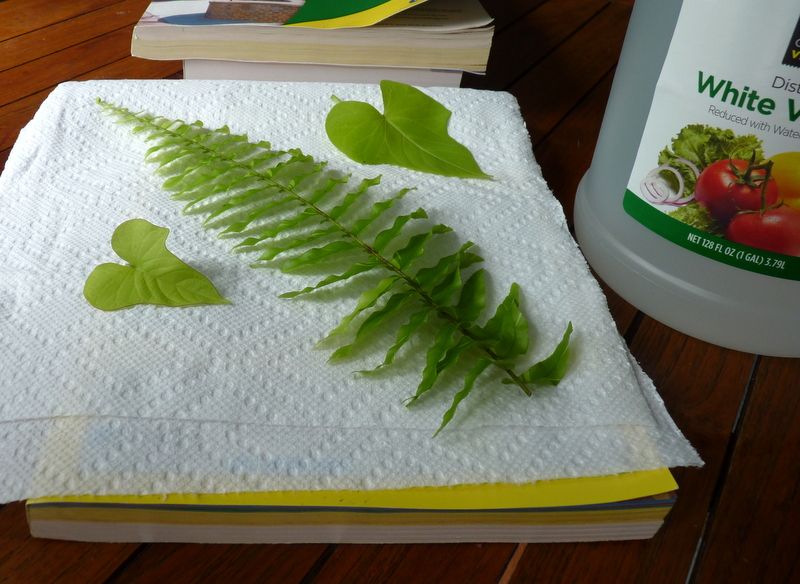 |
| Place your greenery between layers of paper towels. Choose perfect leaves or flowers, free from blemishes or holes. Thinner leaves without much moisture content work best. |
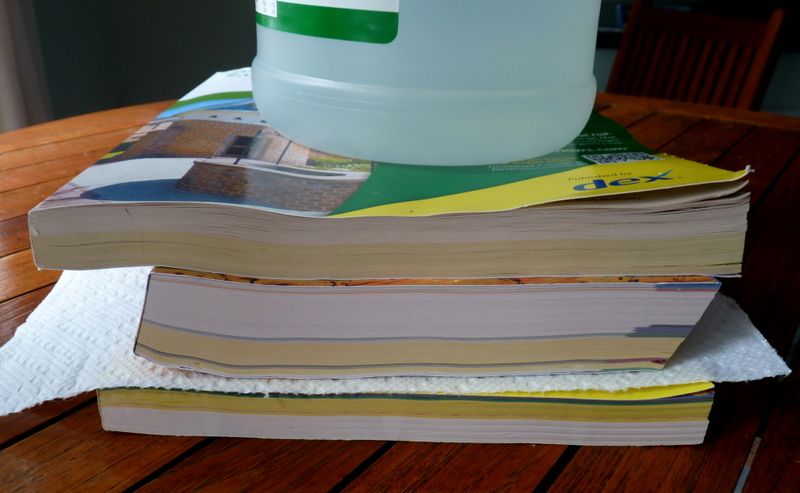 |
| Set the paper towels and leaves between books that are large enough to cover the area of the leaves, and weight the stack with a gallon of something. Depending on how thick the leaves are and how much moisture they have, pressing them to make them dry and flat can take from 1 week to a month. Wish I could be more precise, but there are too many variables. |
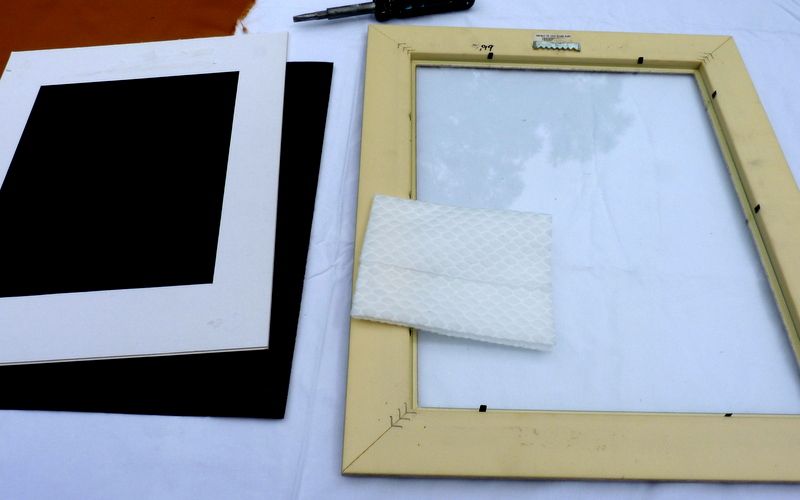 |
| Once your leaves are dry and flat, you're ready to assemble your art. Use your screwdriver to remove the backing and mat from your frame. Clean the glass on both sides to be sure it is spotless and streak-free. If using a recycled frame and glass, remove the glass to clean it well. 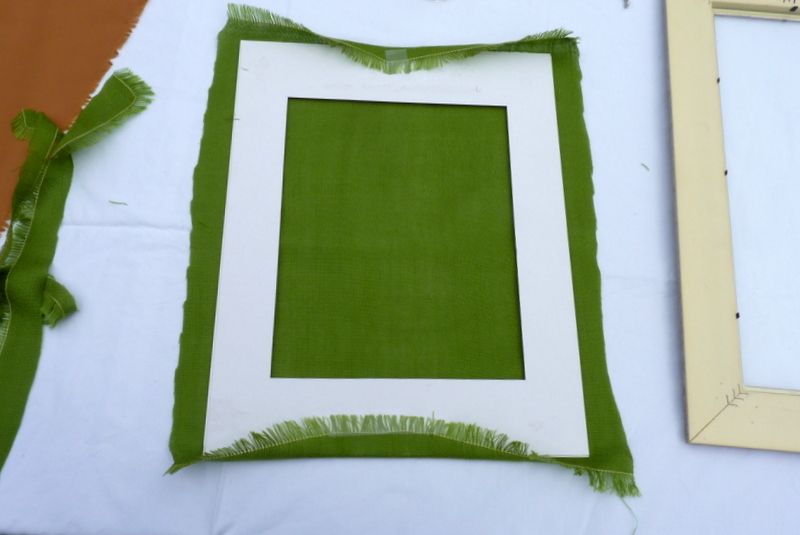 |
Lay the mat face down on the fabric, and rough cut about an inch outside the mat.
Place a piece of tape in the center of each side to hold the fabric.
Alternatively, you can use spray adhesive to hold everything in place.
Alternatively, you can use spray adhesive to hold everything in place.
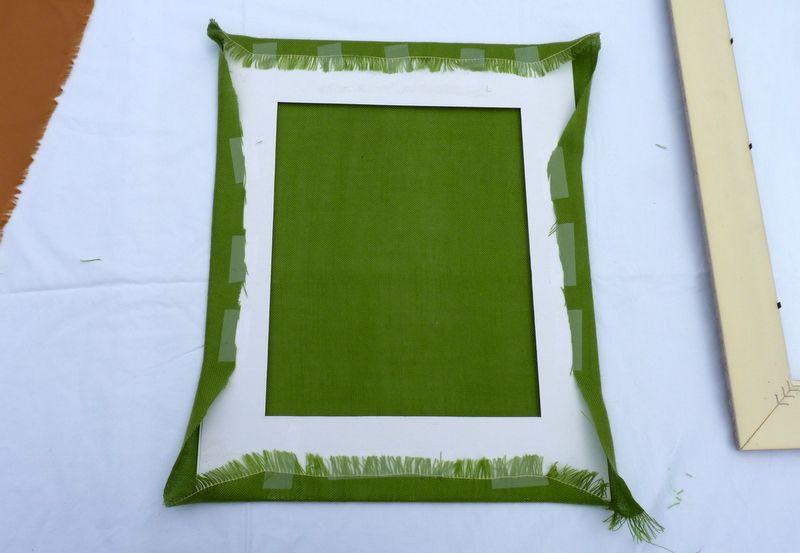
Then, rotating the mat to keep the fabric squared and wrinkle-free,
tape each side, working from the center to the corner on each side.
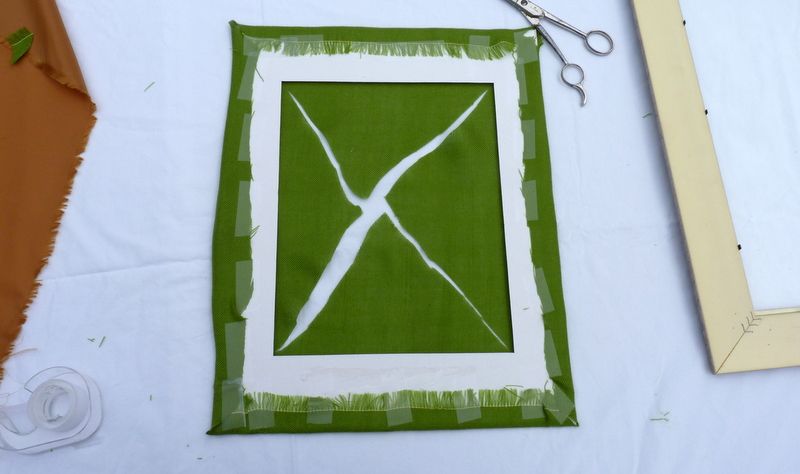
Use scissors to cut an X in the center of the fabric. Cut almost to each corner.
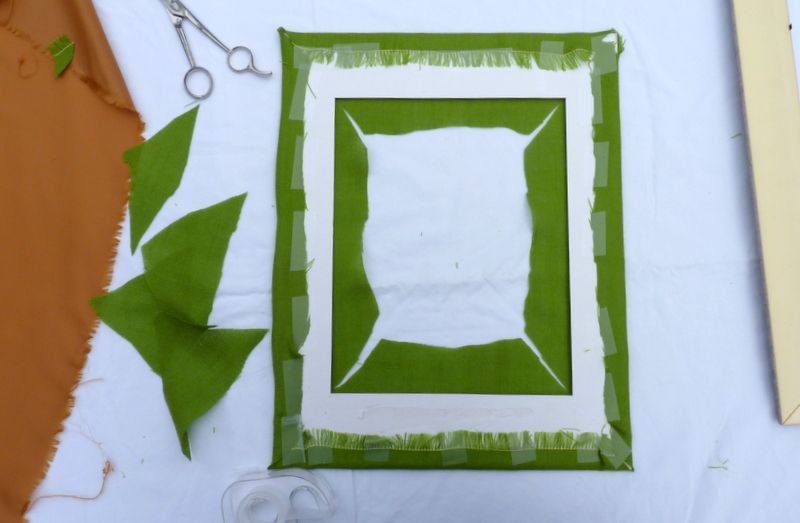
Remove the excess fabric from the center.
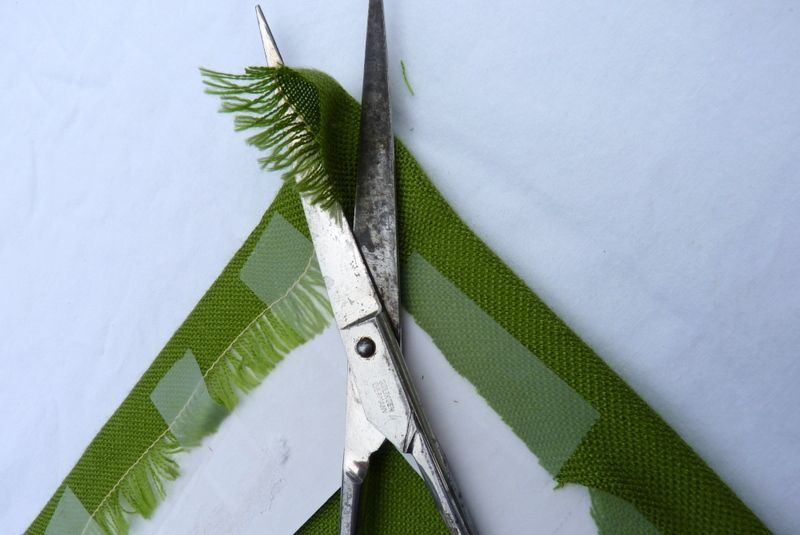
Clip excess fabric from each corner.
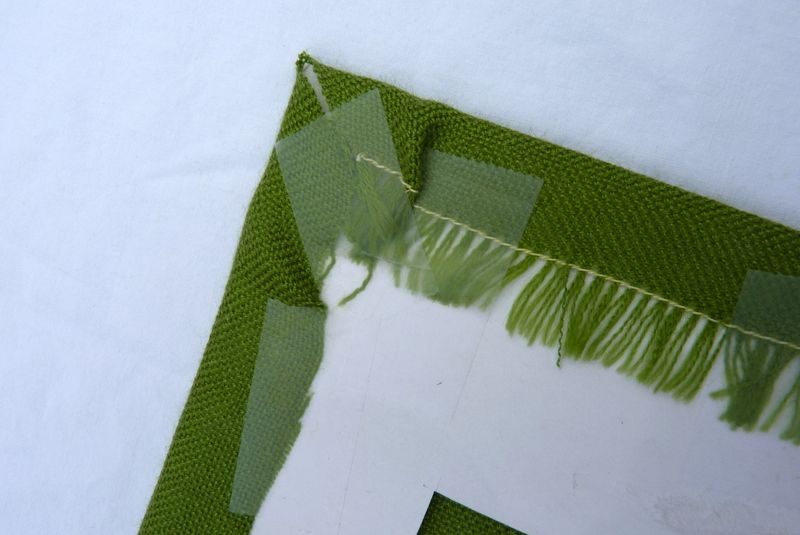
Tape fabric at each corner. The outside corner needn't be perfect,
because the frame will cover the outside edge of the mat.
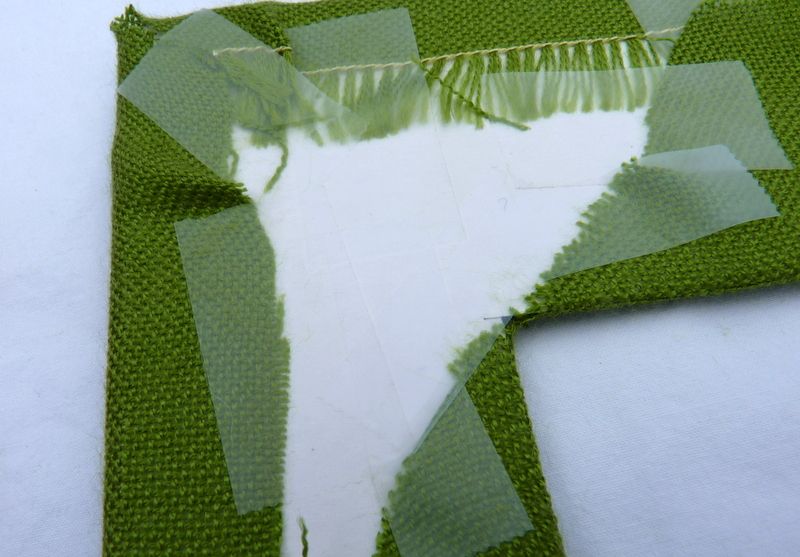
Carefully cut the fabric into the corner, and tape it flat.
Make this inside corner as neat and square as possible.

Lay the glass and then the fabric-wrapped mat in the frame.
Double-check to be sure you have not captured
any lint or other junk under the glass.
Place your pressed leaf or flower on the plain paper
that will be the background of your art.
When you are sure of the placement, use just a few dots
of rubber cement to affix it to the paper. Place the
rubber cement where it won't show, like on the stem.
rubber cement where it won't show, like on the stem.

Place the paper face down on the back of the mat and
use a piece of tape in each corner and in the center of each side to
adhere it to the mat. Turn it over, and double-check that it looks
the way you want. Then, replace the backing on the frame.
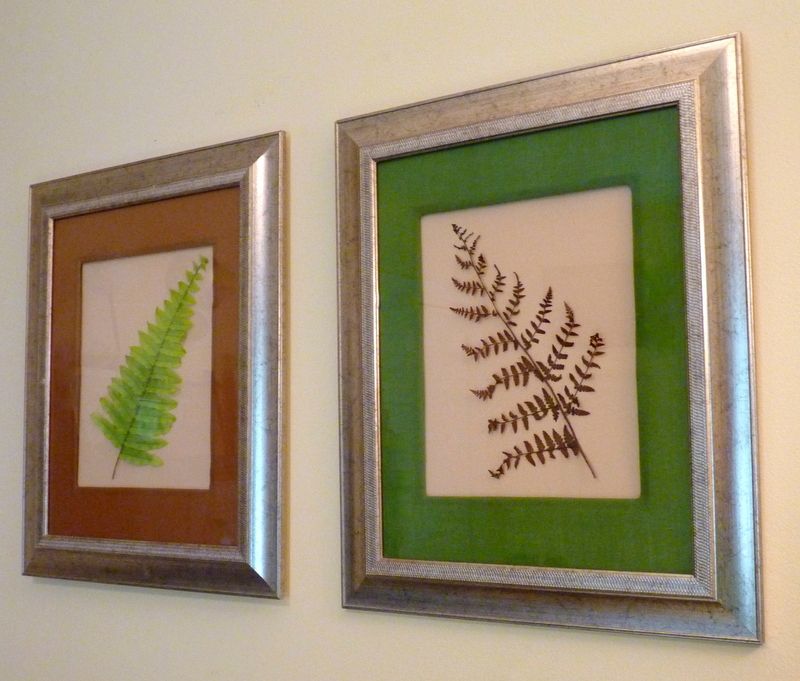
Finally, hang your framed artwork. I chose to use the green mat for the brown fern
and the brown mat for the green fern, to make them play off each other.
I think sets of "prints" like this will dress up any area with style.
If you want to make larger art, you can combine more than
one leaf or flower to fill a larger frame.

Cheap tricks and why they work
What makes this art special is that the mat is custom, so your art looks more important than something you took off the store shelf, or something you printed from an online source and stuck in an ordinary frame to stage your home. Custom mats are one way you can get away with using cheap frames like these that I used for a previous project.
Please note that these pressed specimens are not of archival quality. They may turn brown with time because I did not dry them in silica gel or press them for a year under encyclopedia books, but they will look just fine until your home sells!
Some other possibilities for frugal framing are butterflies, coins, fabric scraps, children's art, photographs, or antique advertising. Choose the content and style of art that flatter your home and that emphasize what makes it unique in buyers' minds.
My eBook, DIY Home Staging Tips to Sell Your Home Fast and for Top Dollars, can give you more ways to add color and interest to your walls. Download now and you can begin creating art that even my friend Judi could manage and be proud of.


