DIY Headboard and Make-Believe Bed

Monday, October 31, 2011
Do you need to stage an empty bedroom, or make a glam headboard to gussy up a drab bed?

You've probably seen photos and tutorials for DIY headboards on the web, but many of them don’t make sense for someone staging a home for sale.

Someone who's trying to save all the cash they can to pay for that down payment on the next house.

Someone who doesn't want to buy and then have to move or store bulky sheets of plywood or wooden frames.

Someone who has other things to do than spending all day hand-tufting a piece of pricey decorator fabric.

Someone who can't stand the thought of making holes to hang or stabilize a heavy headboard onto the newly painted walls. Does that sound like you?

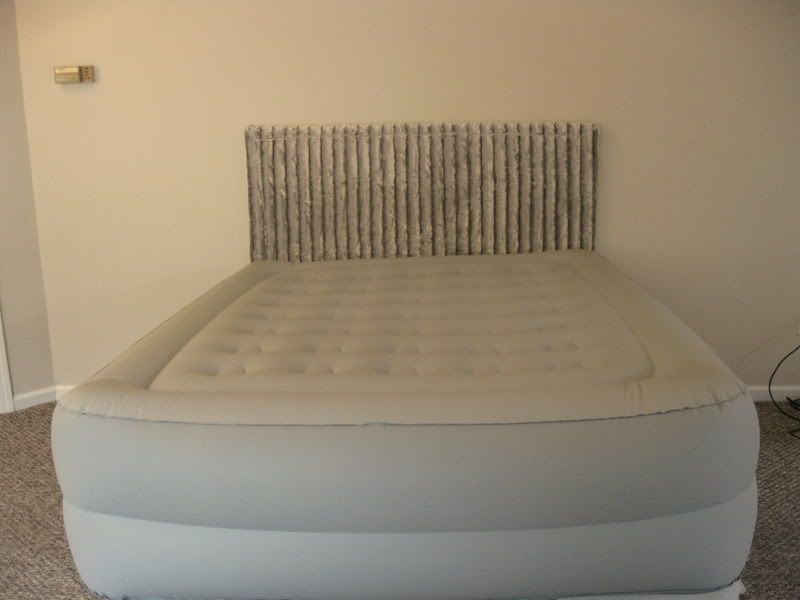
Here is a hassle-free, DIY headboard you can make to stage a bedroom. You can make it from a fluffy blanket or a puffy quilt. I used a duvet with a large quilted pattern to make the grey headboard you see here. Even a sleeping bag is the right thickness.

What's so special?

This headboard starts with a sheet of foam core sheathing sold in the insulation aisle at home improvement centers. It’s lightweight and will cost about $10 for the half-inch thickness I used.

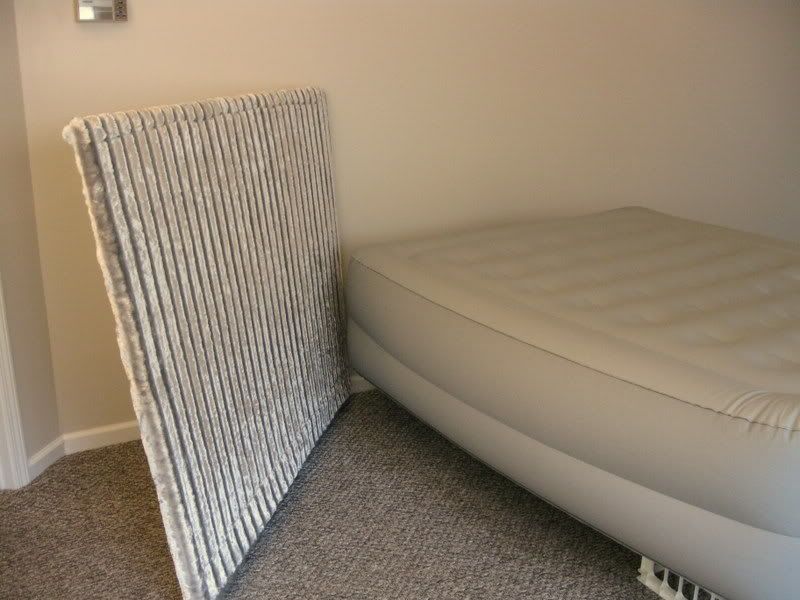
To cover the piece of foam core in this tutorial, I used a faux fur throw.

The faux fur was as wide as the queen size inflatable bed I used. It even had a subtle border that I was able to run across the top of the headboard. It was plush enough to soften the edges of the foam core panel. A thick covering like this means you don't have to bother with a layer of polyester batting or expensive foam. Easy!

The inflatable is my choice for staging an empty bedroom. It’s cheaper and more practical than investing in a box spring and mattress, and easier to deal with on moving day.


What you need

  • One inflatable bed, and pump
  • Four milk crates, of equal dimensions
  • One 4- by 8-foot sheet foam core insulation
  • Yardstick
  • Ballpoint pen  
  • Utility knife
  • One thick blanket, quilt, duvet, or fake fur throw
  • Masking tape or duct tape

How to do

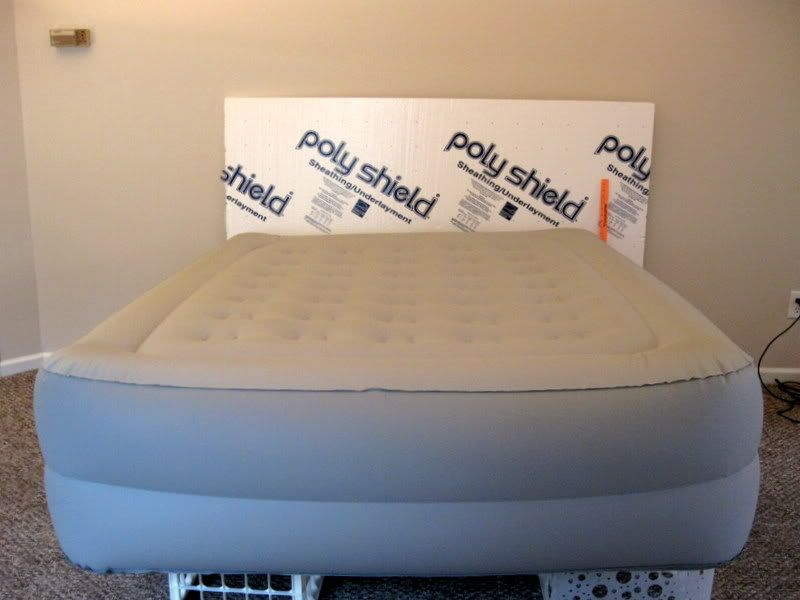
Blow up the inflatable, and put the head of it against one wall, where you want the bed to be. Set one milk crate about a foot inside each of the four corners of the bed.

“Dry fit” the foam core behind the bed to check the size.

I had already roughly trimmed with a utility knife my 4- by 8-foot piece to about the size I knew I wanted, adding a few extra inches.

Mark the width you want the headboard to be. It should be a little wider than the bed.

You can make rounded corners by tracing around a plate on the upper two corners.


Measure carefully so the headboard will sit squarely. My orange yardstick shows where I wanted to cut the panel. Mark the cut-off line with your pen.
 
Cut the foam core panel with the utility knife, using a sawing motion, being careful not to cut carpeting. Bend the foam core panel to break it, then finish cutting all the way through, using the utility knife.


Lay your blanket face down on the floor.

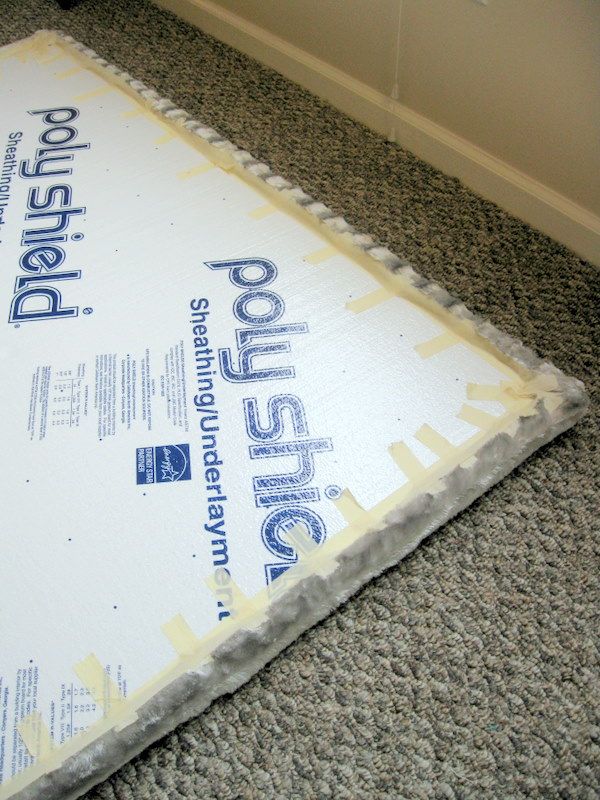
Center the headboard on the blanket. If there is a large pattern to your blanket, or if it has a centered design, center the design.

If the fabric has an obvious up-and-down design (like letters or figures), be sure “up faces up.”

Wrap the blanket around the foam core panel edge.

Place masking or duct tape at intervals all around. My blanket had stretch to it, so I used lots of pieces of tape to make sure it was stretching evenly. Re-check your front design.


Finish taping so all edges lie flat and are secure.

Duct tape is preferable if you plan to use the headboard long-term.

Slide the headboard behind the bed. If you want to make it taller, you can tape a string to the back and hang it on small nails. Usually, setting it on the floor works fine.

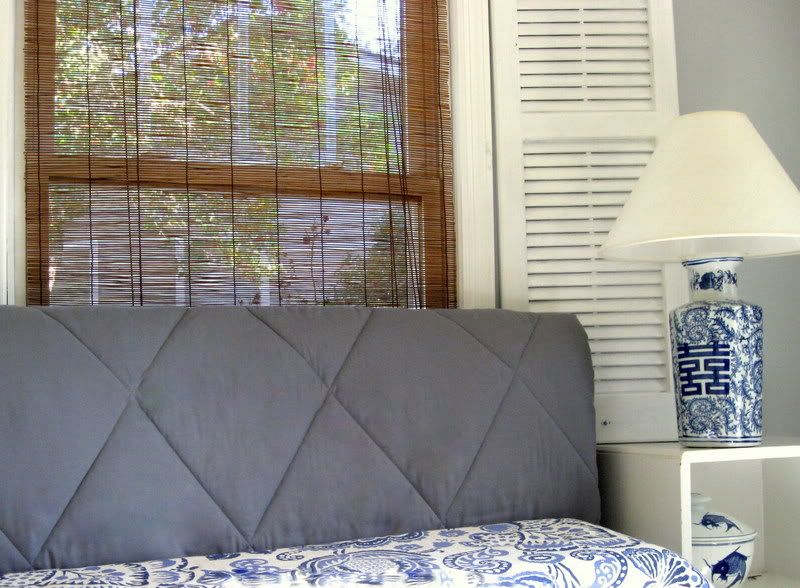
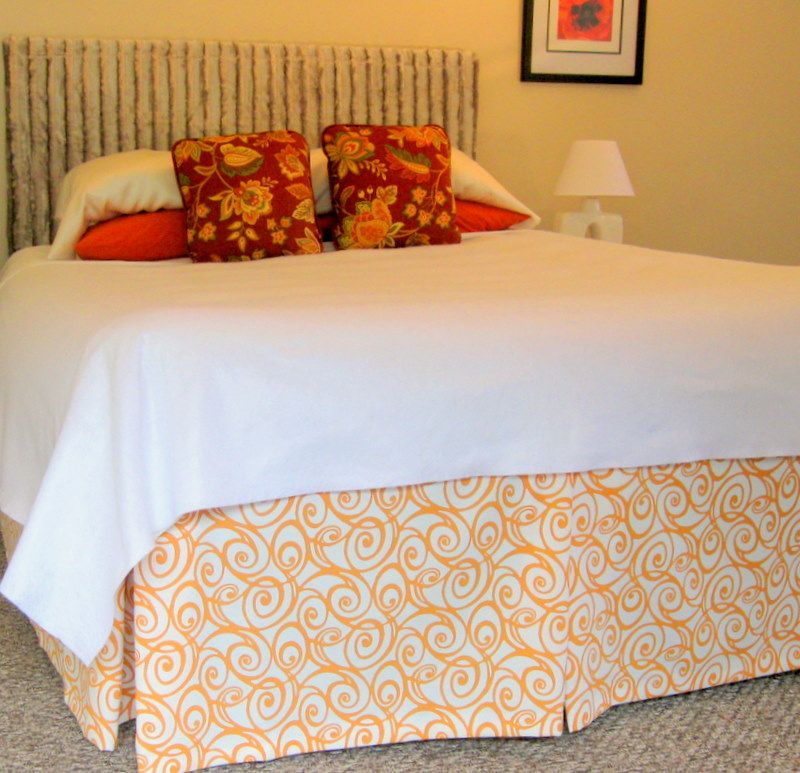
Your new headboard is complete. With the right bedding, you can create any look you want for staging your bedroom.


To hide the fact that the bed is an inflatable, you’ll need to make a bedskirt. Later this week, I’ll post my tutorial showing how to make the tailored bedskirt shown below, with box pleats at the corners and center. It calls for just three and a half yards of fabric -- fabric that you can use again another time. Like, after you have sold your house want to make curtains for your new home!

Bedrooms are often the first room buyers look at when they tour homes. An empty bedroom is a missed opportunity to showcase your home as a comfortable, accommodating, and special place, yet it can be the most economical room to stage. A beautifully made bed, a headboard, some art, some plants, a bedside table or two, and you're done!

Get the look, get the book

For more ideas on how to stage your own home on a shoestring, download my eBook, DIY Home Staging Tips to Sell Your Home Fast and For Top Dollar.

Home for Sale? Pretend You Are a Tourist in Your Town

Monday, October 17, 2011
Every home needs a welcome sign.
If you are looking for ways to make your home on the market stand out, try looking at it with fresh eyes. The eyes of a tourist to your town.  

I checked the stats, and can report to you that according to a 2010 survey by the U.S. Census Bureau, almost 12% of the people who moved, moved to a different state. Almost 17% moved to a different county in the same state.

Even if prospective buyers for your home are from another neighborhood, staging your home to accentuate what's special about your neighborhood, your town or county or state is just plain smart.

I've blogged already about the value of knowing the specialness of your part of the country and your own location.

Last week I spent a few days in another place, a part of my state that is worlds away. Getting there takes just 2 hours by car and then 2.5 hours by ferry.  Yes, ferry. We went to Ocracoke Island, off the North Carolina coast. 

Once on this small strip of sand, surrounded by the sea, life slows down and you can't help but savor the simple things. Fresh, salty air and bright blue skies that reach to the level horizon in all directions. Friendly, honest people who still sprinkle their thick brogue with words that no one has used since Shakespeare's time. Seafood prepared with attention to its real flavors. An appreciation for the way life used to be, when a boat brought mail to you once a week.

We chose the perfect season to visit. Weather was ideal, and beaches were uncrowded.
I did not take pictures of people's homes, but I did take photographs of signs, because I think words painted on wood and words printed onto museum labels tell interesting stories. I hope you'll enjoy the photos I brought home. And I hope you can see the beauty of your own location, if only to help you merchandise your own home on the market.

When you live on sandy shores, and going barefoot is the order of the day, you need this.
From Ocracoke you can go kayaking or go fishing, or just let someone else take you cruising.
The sign gives you the idea of just how small the inhabited section of the island is.
It's a short walk to the lighthouse, still working to signal boats at sea.
In 1942 British soldiers died at sea helping America defend our shores. Locals still honor them.  
Part of a display at one of the small, local museums.
More signage from the museum.
I love any hand painted sign, especially when a skeleton becomes an arrow!
I had the curried (local) shrimp with baby eggplant.
Remember to look at your home not as someone who wants to move, but as someone who appreciates the best of what your location has to offer. Then, be sure that your home staging, as well as any literature emphasizes what's unique and remarkable about where you live.

My $4.99 ebook, DIY Home Staging Tips to Sell Your Home Fast and For Top Dollar, helps you stage your home yourself, no matter where you live. You can download it now and start staging today to make your home that one that stands out from the competition.

Quick Tips to Nailing Your Curb Appeal

Monday, October 03, 2011
By now everyone's aware of the importance of curb appeal.

With competition strong for buyers' attention and most home searches beginning on the web, how the front of your home looks is more important than ever. It better stand above the comparable listings.

How do you make your home more inviting than the others without hiring a landscape designer, a house painter, and a decorator to spruce up the exterior?

You use these time-saving, labor-saving tips.

Work smarter

Reduce the amount of lawn you have by mulching wide around trees and shrubs.

If mildew is a problem on your home's siding, use a garden sprayer and a product called Wet and Forget to clean it without the hassle of a pressure washer.

Keep a broom handy near your front door but inside the house, and have a routine for giving the walls around the front door a sweeping. This is a good task to delegate to a member of the household. Include the walkway to your home if it collects leaves, papers, or other debris.


If you don’t have a green thumb or can't be bothered with the mess, buy ready-made planters and hanging baskets at a local nursery, garden center, or greenhouse. 

Reduce the decorative clutter in your front area. On a porch, instead of crowding it with multiple seats, planters, wreaths, flags baskets, and tables, opt for a bench and the simplest splash of colorful flowers (they don't have to be real).

What fabric you do have should be clean, and not faded. A good investment is colorful pillows from discount stores. They will make an old chair new again. An even quicker refresh is wrapping last year's pillows with bright, new fabric. Just wrap, don't sew.


If that old chair needs a facelift, spray it the same color is already is. A color change takes more paint and more time and a simple touchup with the spray can.

If your porch flooring is not all that appealing, cover it with an outdoor rug.

Have a system for maintaining flowers and plants. A routine for watering, deadheading, and fertilizing will simplify the chores and increase attractiveness.

Have a reliable and economical source for seasonal plants. Know when to pull the spent springtime pansies and bring in the summer annuals, and when to yank those for the mums of fall.

If your garage door needs a fresh coat of paint, well, painting an overhead garage door is easier than you think.


Studies have shown that people don’t buy based on facts or price alone, but that their feelings and emotions also play a large part in their spending decisions. Capture their hearts from the curb!

Your goal is to create an alluring and inviting space that entices home buyers to wonder, “Wow, if this is what the outside looks like, I can only imagine how fantastic the rest of the house must be.”

For more tips on making your home ready for buyers, download my homestaging eBooks. Click the link for a rundown of what you'll learn, and a one-click way to order. You can start your staging today! 

Popular Posts